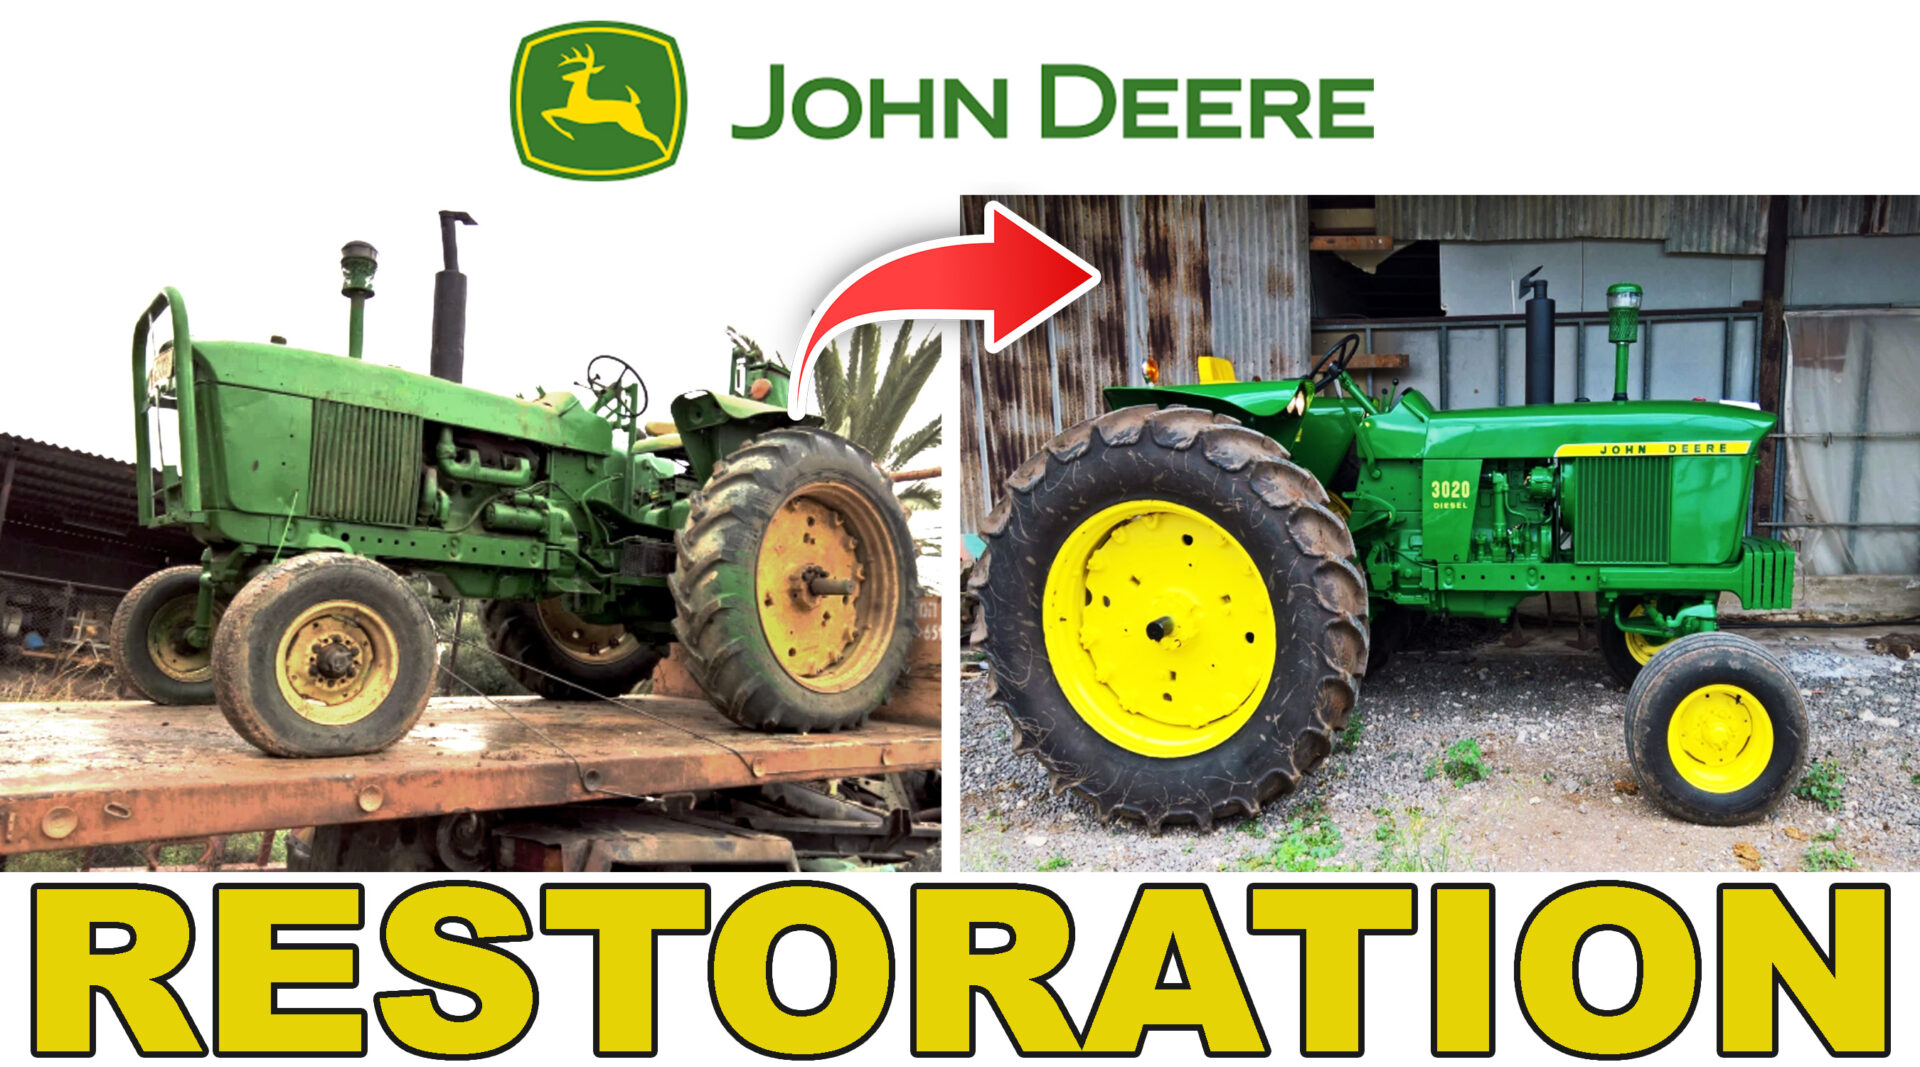
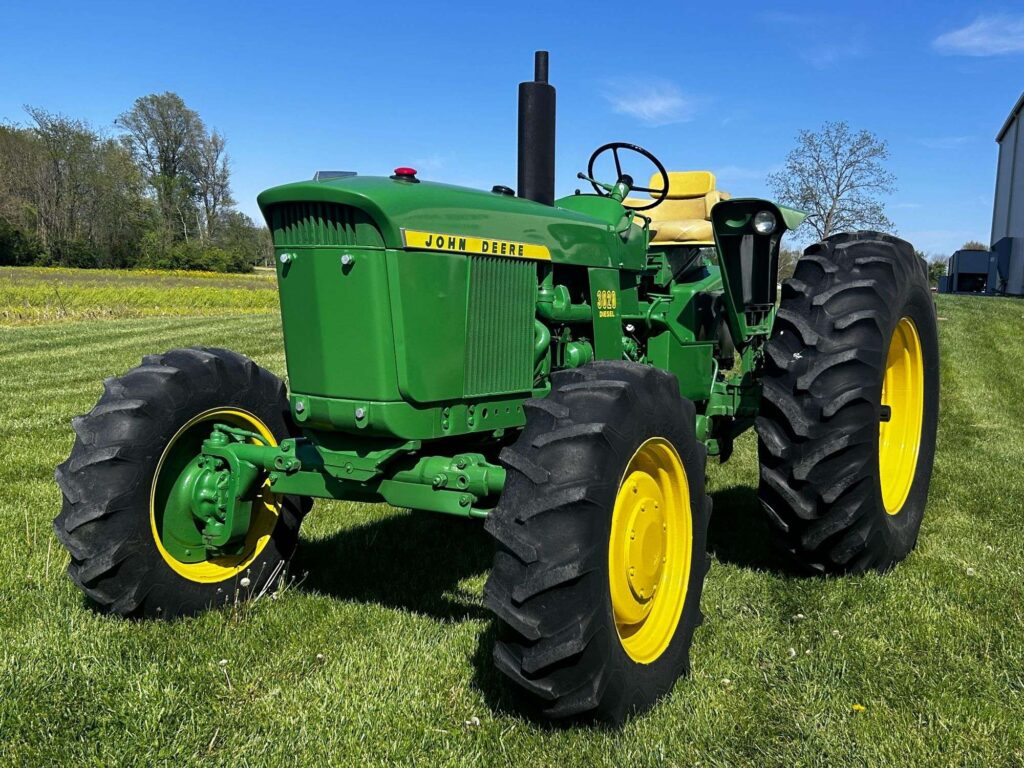
The story begins with a chance encounter between two friends, Roei Deri and a tractor enthusiast who, like Roei, had a soft spot for powerful machines and the open fields they tended. Roei, known for his fleet of imposing John Deere tractors, often welcomed his friend into the cab during the harvest season. There, the two would soak in the earthy scent of freshly plowed soil and marvel at the horsepower beneath their feet. But while Roei’s modern tractors powered his work, he had a hobby that kept him busy after hours: restoring vintage John Deere machines. Recently, he had completed two remarkable restorations—a John Deere 3020 and a John Deere 4020 FWD.
When he proudly showcased these restored beauties, his friend couldn’t help but be captivated. Almost without thinking, he declared that he, too, wanted to take on a restoration project. Roei, recognizing this spark of enthusiasm, didn’t waste a moment. “I know exactly the one for you,” he said with a grin, reaching out to connect his friend with Ziv Riklin, the owner of a vintage John Deere he knew would be a perfect fit: a 1964 John Deere 3020 Syncro-Range.
Arrangements were quickly made, and soon they were off to meet Ziv. Over a few cups of coffee, exchanged stories, and a few shared cigarettes, they discussed the machine in depth. By the end of the meeting, a deal was struck—the John Deere 3020 was his friend’s, ready to be taken on the journey back to its glory days.
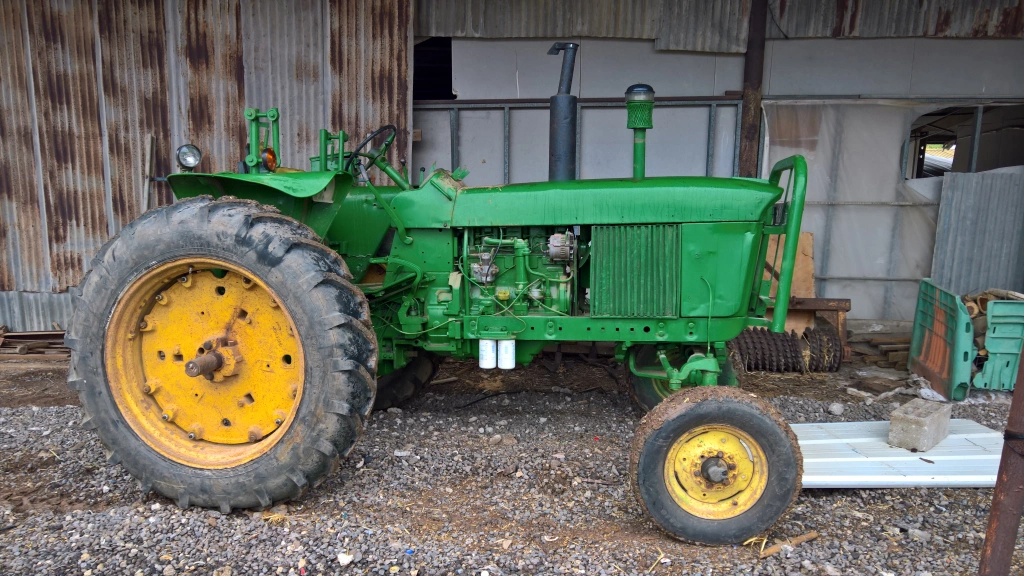
Although the tractor was still in operational condition, it bore the marks of years gone by. Every part was functional, but its shine had long since faded, hidden beneath layers of dust and wear. Inspired by the image of this 3020 as it once looked—bright and pristine as it rolled off the factory floor—he set his sights on bringing it back to life, just as it appeared some 53 years ago:
The preparations
The preparations for the restoration project began with an essential step: creating the right workspace. The tractor enthusiast’s father owned a farm equipped with a small garage for tools and equipment, but it quickly became clear that this restoration would need a dedicated space with room to spare. The scope of the project demanded an upgrade—a larger garage that could handle the extensive work ahead.
With that goal in mind, they decided to build a new, more spacious workshop. They began by clearing out the remnants of an old barn, carefully removing years of accumulated debris. The cleanup was no small task, but it was the first step in transforming the area into a workshop fit for bringing a vintage John Deere back to life.
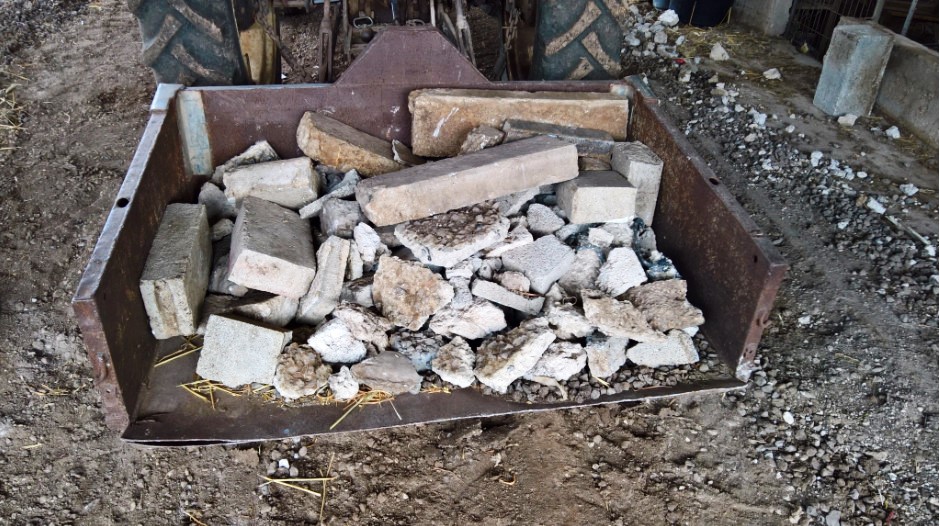
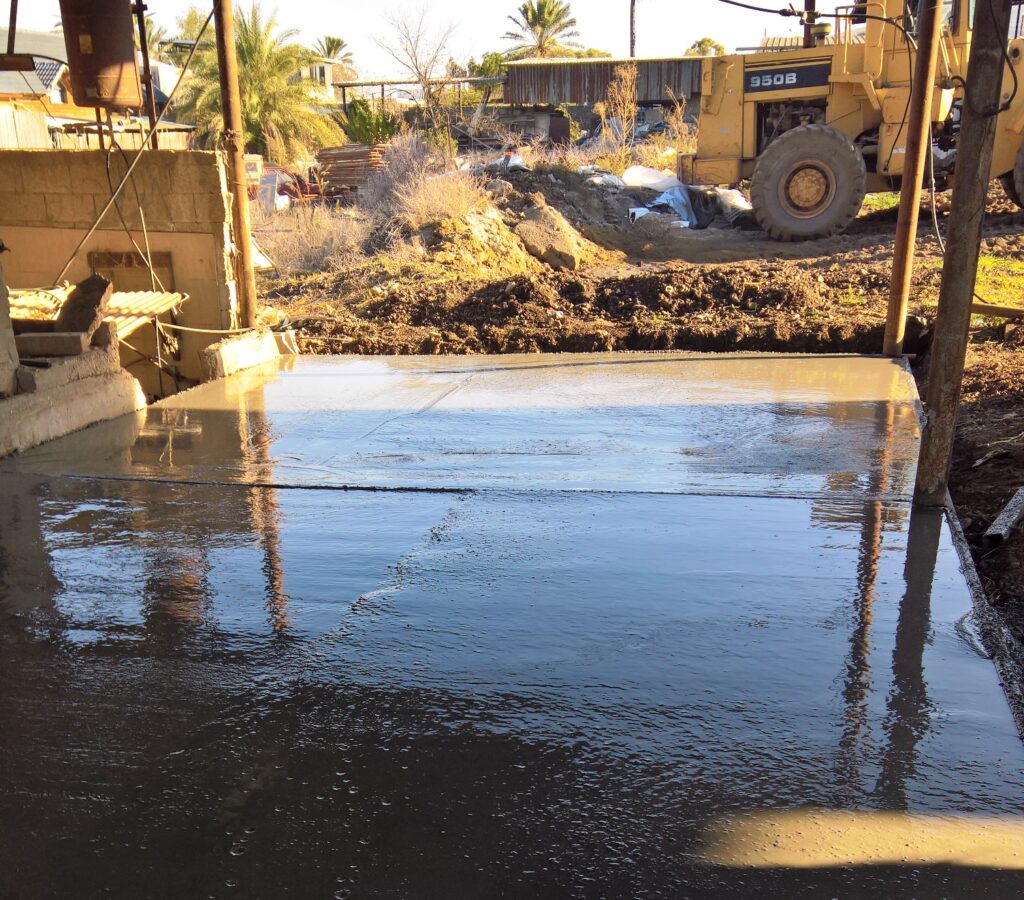
Once the debris was cleared and the area prepared, the next step was to create a strong foundation for the new garage. They carefully leveled the ground, ensuring a stable surface that would support both the structure and the heavy machinery it would house. With precision and patience, they prepared the area, and soon enough, it was ready for the concrete pour.
Pouring the concrete was a significant milestone—it marked the transition from planning to building, and soon this solid foundation would become the heart of their restoration efforts. With the concrete curing in place, they were one step closer to having a dedicated workspace for the project ahead.
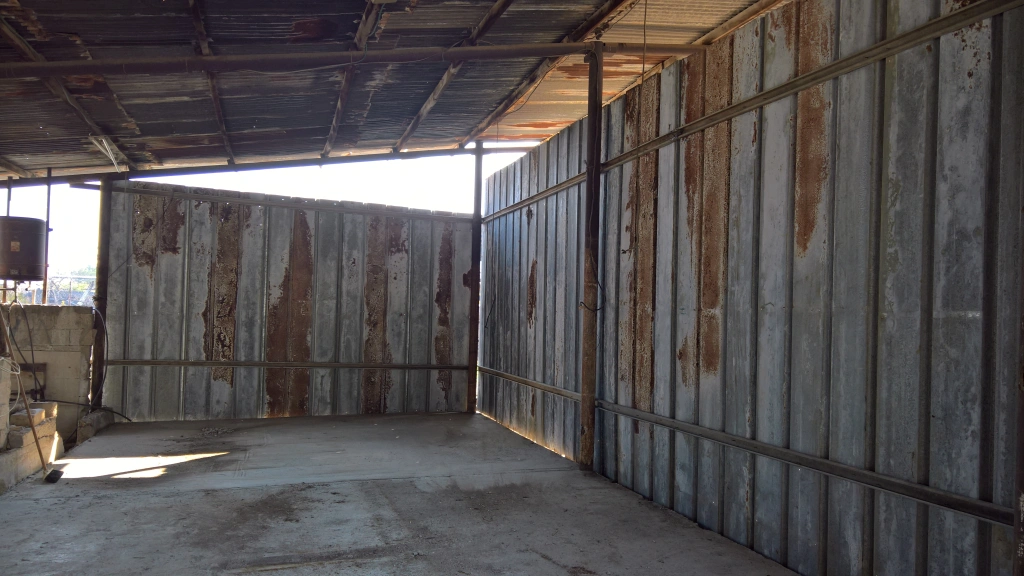
With the concrete foundation set, they moved quickly to close in the walls, turning the open space into a sturdy, enclosed workshop. Wall by wall, the structure took shape, until finally, the new garage stood complete.
The workspace was now ready—a perfect spot for the upcoming restoration of the John Deere 3020.
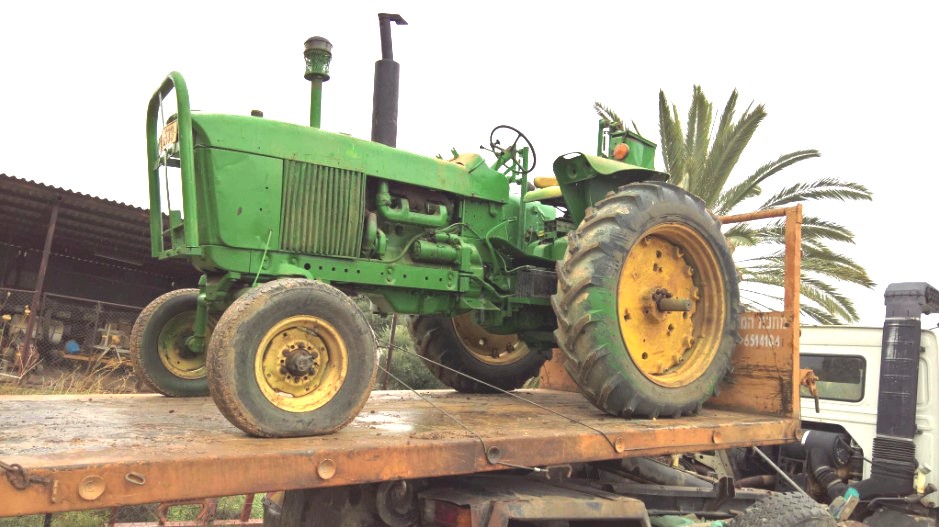
On a cold, rainy December day, the tractor finally arrived at its new home. With the help of another skilled restorer, Meir Ben-Shushan—known to friends as MBS—they transported the John Deere 3020 to the freshly built garage.
Despite the weather, spirits were high. The tractor was now in place, ready to begin its journey back to life in the capable hands of its new owner and his dedicated team.
Additional preparations
With the tractor settled in its new workshop, a plan took shape. Father and son agreed to tackle the project with patience and precision—no rush, and no shortcuts. For a farmer, this was no small commitment. Farming often demands quick fixes and clever improvisation, as time is always in short supply. Farmers are, by necessity, jacks-of-all-trades: welders, mechanics, builders, and more.
But this restoration would be different. They wanted to do everything by the book. So, the first step was to order the original Service Manual and Parts Catalogue from Jensales. These manuals would be their guides, ensuring that each step honored the integrity of the John Deere 3020’s original design.
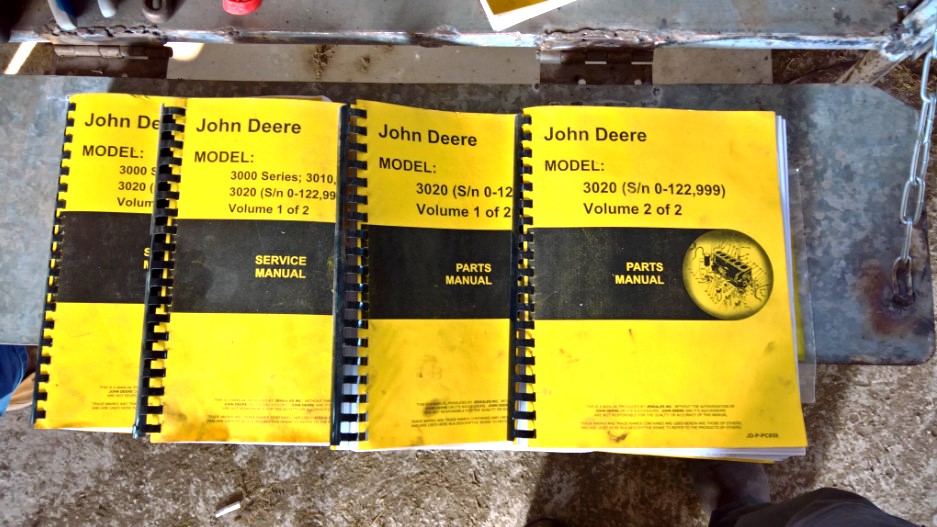
When the manuals arrived, it was time to dive in. They began disassembling the tractor piece by piece, carefully inspecting each component. Any part that was missing, broken, or non-functional was noted for replacement. To keep everything organized, a detailed Excel document was set up to track every part needed—a step that quickly proved invaluable as the list grew.
This meticulous approach ensured nothing would be overlooked, setting a solid foundation for a true restoration, one that would bring the John Deere back to life with every detail in place.

Sourcing parts for the restoration proved to be one of the biggest challenges, as nearly everything had to come from the United States. While finding the parts online was straightforward, getting them shipped to Israel was another story. For the larger or rare pieces—like the sheet metal and chair assembly—orders were placed with AG Parts. Chuck from AG Parts was especially helpful in guiding the process, but shipping was complex. Using a forwarding service, USHOPS, helped, though it meant navigating customs paperwork and official forms to ensure everything cleared smoothly.
For more common components, a local John Deere dealer stepped in to help. Yuval, their trusted contact, provided essential parts, making it a team effort.
An unexpected twist came with the tools. Since John Deere tractors are proudly American-made, they were built using the imperial measurement system. This meant that all the tools had to be in inches, rendering the family’s collection of metric wrenches and tools practically useless. With a fresh set of inch-based tools, they were ready to take on each bolt, screw, and panel.
Real beginning and reality
With the tractor fully stripped down, it was time to assess the condition of the sheet metal up close. The inspection revealed some serious issues, especially with the fenders. Years of exposure had left them in rough shape, with the bases almost entirely eaten away by rust. The damage was extensive, and it was clear that restoring these parts would take a lot of work—or possibly require complete replacements.
This was one of those moments when the reality of a full restoration set in, but they were committed to seeing it through, rust and all.
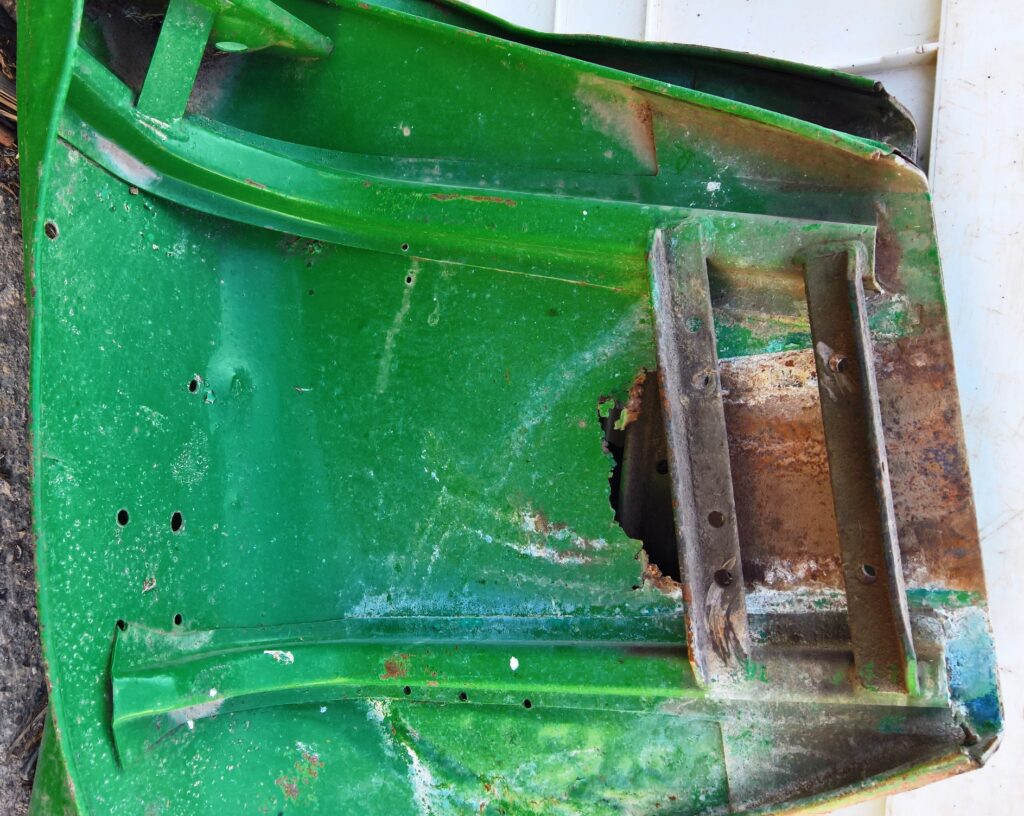
Fortunately, not all the sheet metal was in such dire shape. The hood and cowl, though aged, were still in relatively decent condition compared to the fenders. While they’d need some attention to restore their original luster, these pieces looked salvageable with a bit of careful sanding and repair.
It was a small relief, knowing that some original parts could likely be restored rather than replaced entirely.
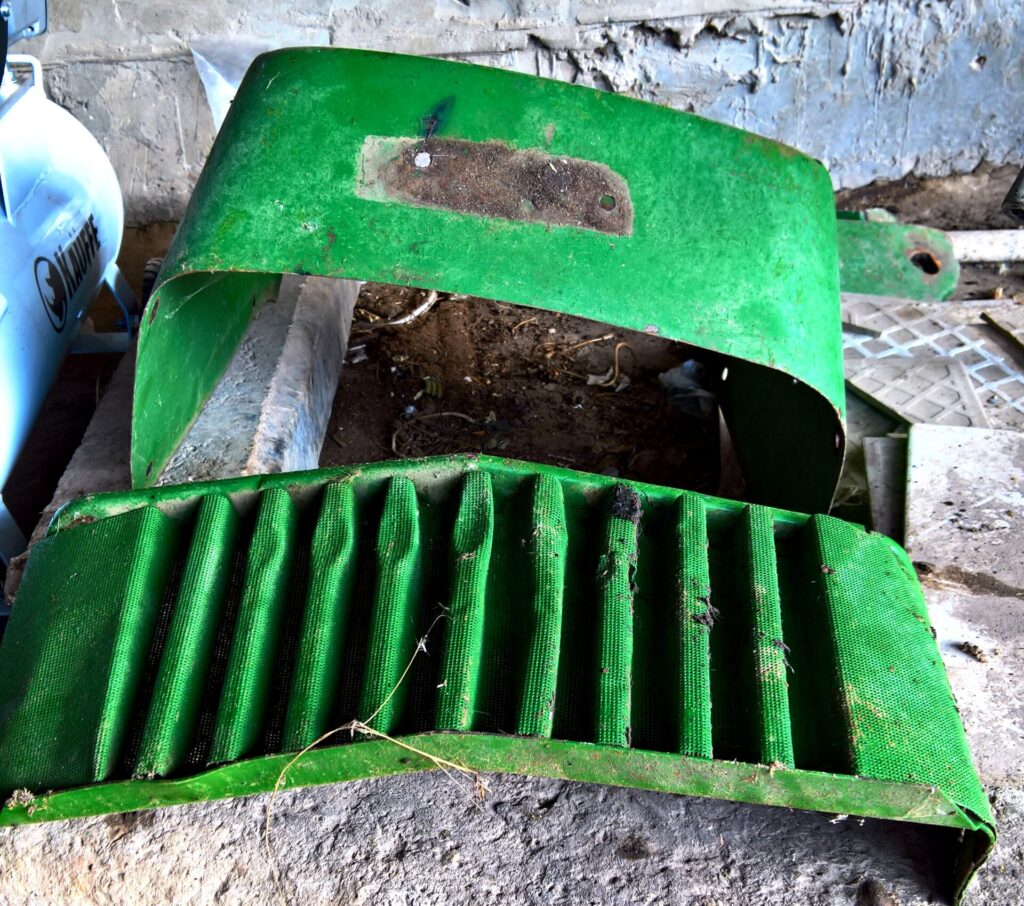
The inspection also revealed that the front screen was in rough shape—it was completely bent out of form. This piece would require either some serious reshaping or a full replacement to bring it back to its original look.
Each discovery highlighted the work ahead, but every detail noted was one step closer to a full, faithful restoration of the John Deere.
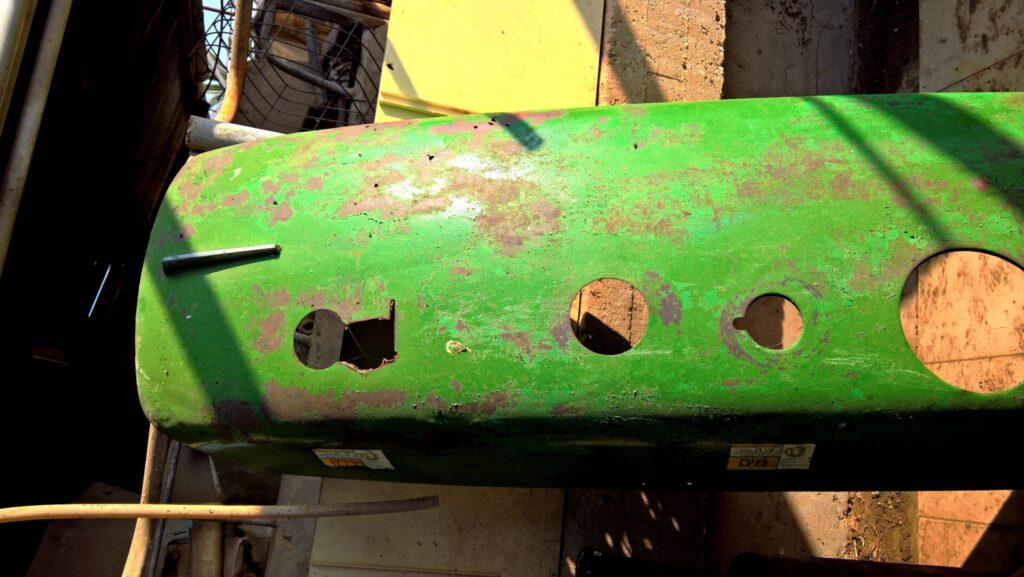
The hood became an experimental testing ground for removing the old paint. He tried various chemical paint strippers, hoping for a quick solution, but none lived up to expectations. In the end, good old-fashioned sandpaper and a metal brush proved to be the most effective way to strip the paint down to the bare metal.
With all the sheet metal parts gathered, he took them to a skilled whitesmith for a professional opinion. The verdict was clear: each piece was beyond repair. Surprisingly, this diagnosis came as a bit of a relief—it meant he could confidently order new parts, knowing that restoring the old metal would never achieve that fresh-off-the-line look. Starting fresh with new sheet metal would ensure the tractor looked as close to factory-new as possible, with no need for heavy filler or patchwork.
Getting small parts
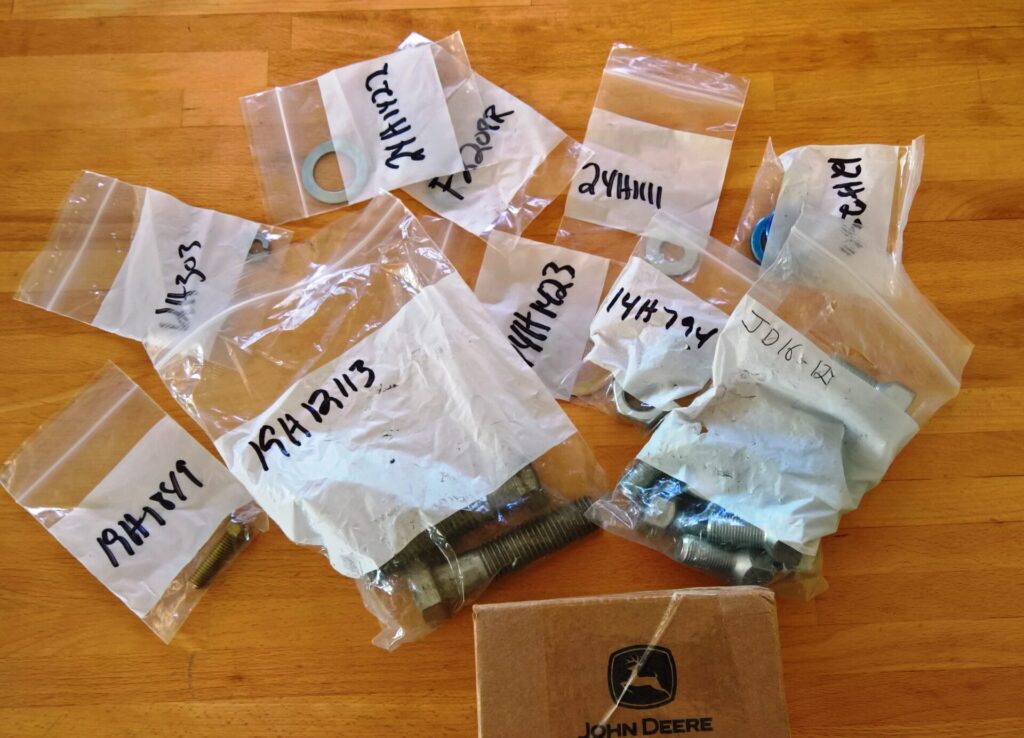
Finding the right nuts, screws, washers, and other small hardware pieces turned out to be another challenge. While John Deere dealers stocked them, they typically came in bulk packs of 50, 100, or even 250—far more than what was needed for a single tractor.
After some searching, he discovered the Green Part Store online, a treasure trove for specific parts without the bulk. It had everything he needed in manageable quantities. With a few clicks, he placed the order, and soon the exact parts arrived, each one ready to play its role in the restoration.
Brakes valve assembly
The brake valve assembly was next on the list. While replacing only the torn boots would have been the quick fix, they decided to go the extra mile. Instead of a simple patch-up, they took the entire assembly apart, opting for a full refurbishment. This way, they could ensure every component was restored to top condition, guaranteeing the brakes would function as smoothly as they did on the day the tractor first rolled out of the factory.
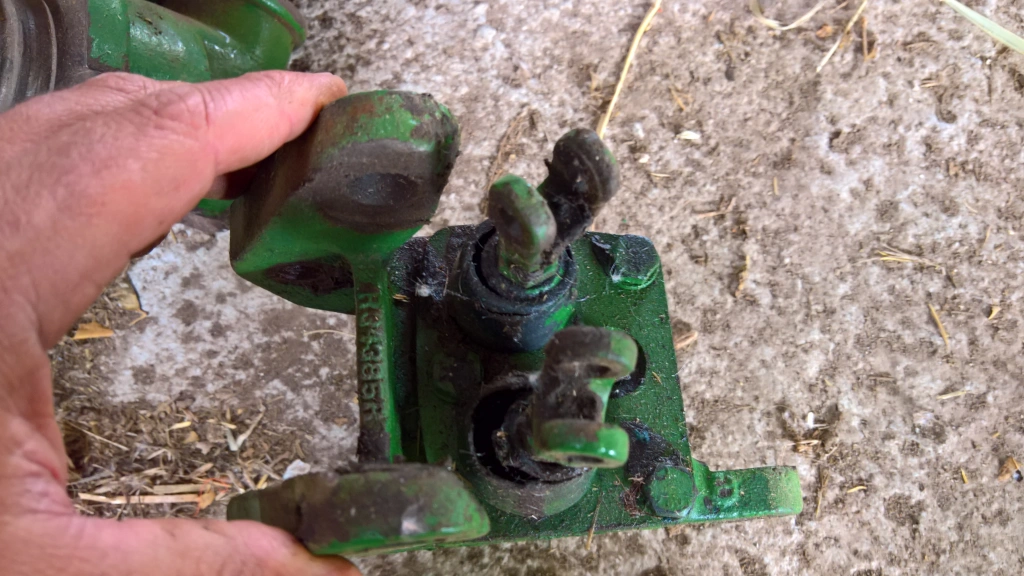
Overhauling the brake valve assembly was no easy task. It required a steady hand and a lot of patience, but the effort was well worth it. Knowing the brakes would work perfectly gave him peace of mind.
He had ordered a complete brake overhauling kit (AR31946) along with two new boots (RE244537) specifically for the job. Once the parts arrived, he carefully began the overhaul, working inside a plastic box to avoid losing any of the tiny pieces. Each component was meticulously cleaned using kerosene, a brush, and high-pressure air, ensuring that everything was spotless and ready for reassembly.
It was a painstaking process, but as each part clicked back into place, he knew the brakes were now fully restored and reliable.
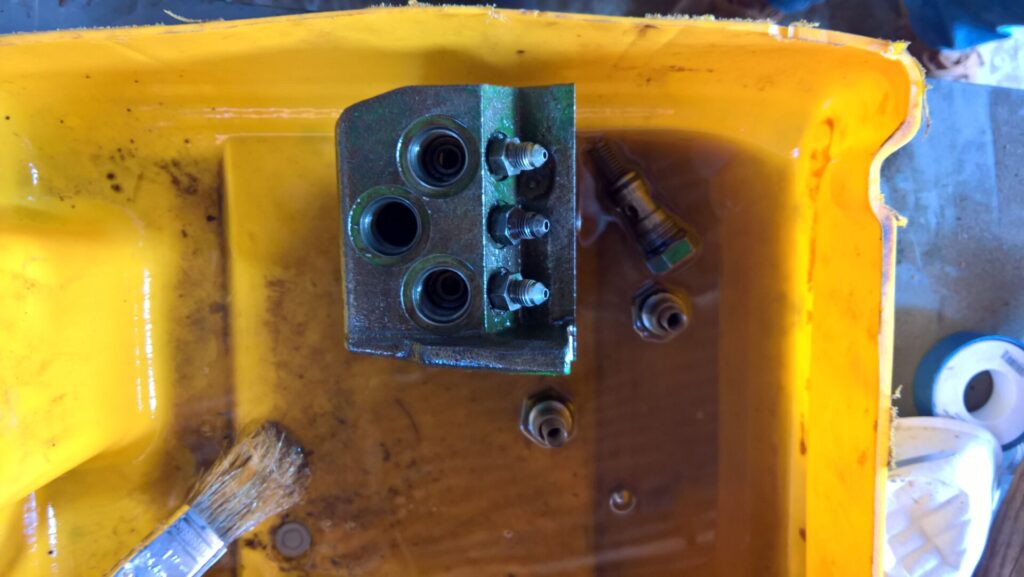
To begin the delicate work on the brake valve assembly, he carefully laid out each part in a small box, along with all the small moving components. This setup helped him keep everything organized and within reach, minimizing the risk of losing any critical pieces.
With each part sorted and visible, he was ready to dive into the meticulous task of cleaning and reassembling the brake assembly, ensuring every piece was accounted for and properly prepared for a flawless rebuild.
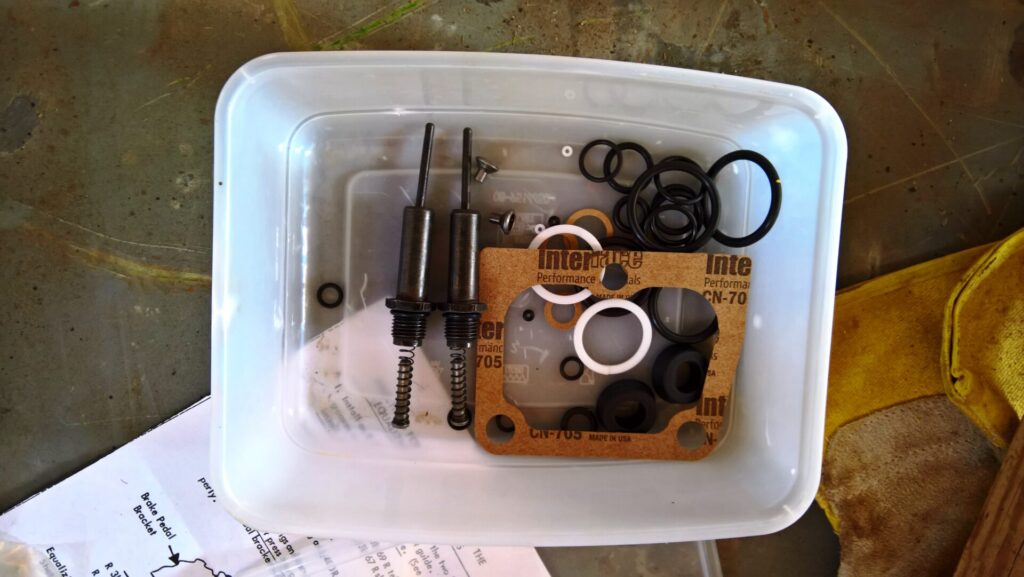
Replacing the O-rings was a meticulous process, with plenty of them to swap out. Before putting on each new O-ring, he applied a bit of oil to ensure a smooth fit during assembly. He took care to discard each old part away from his workspace, preventing any mix-ups with the new components.
Particularly delicate were the four metal balls inside the assembly—small but essential pieces that could easily be misplaced. With caution, he made sure each one was securely in place. Once the lower part of the assembly was complete, a paper gasket needed to be applied, providing a tight seal and marking another step closer to a fully restored brake system.
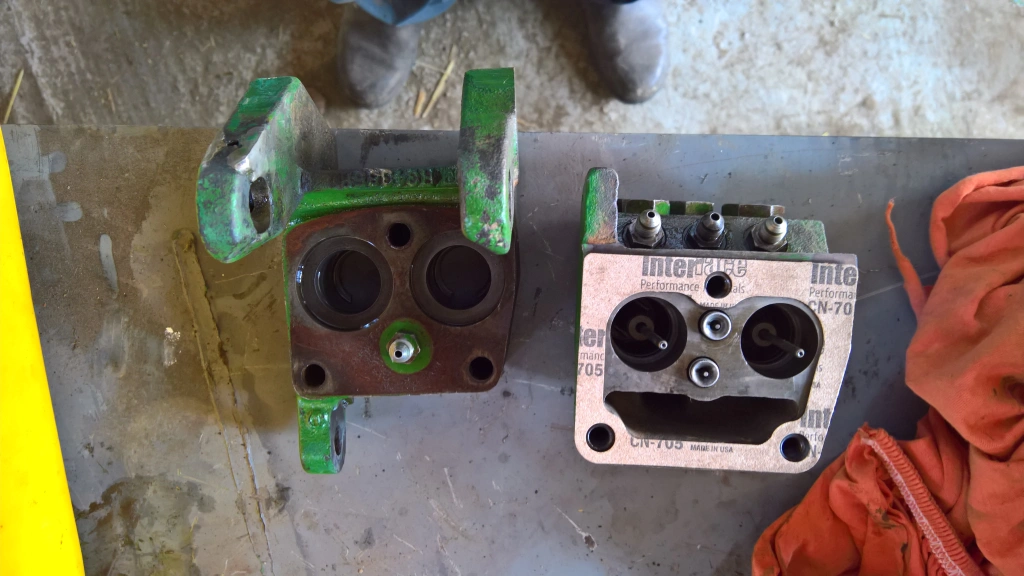
With the lower assembly complete and the paper gasket in place, he moved on to the upper part to finish the job. Some of the pieces were tiny, making the reassembly a bit challenging, but he discovered an ingenious design feature by John Deere’s engineers: each part was crafted to fit only in its correct position.
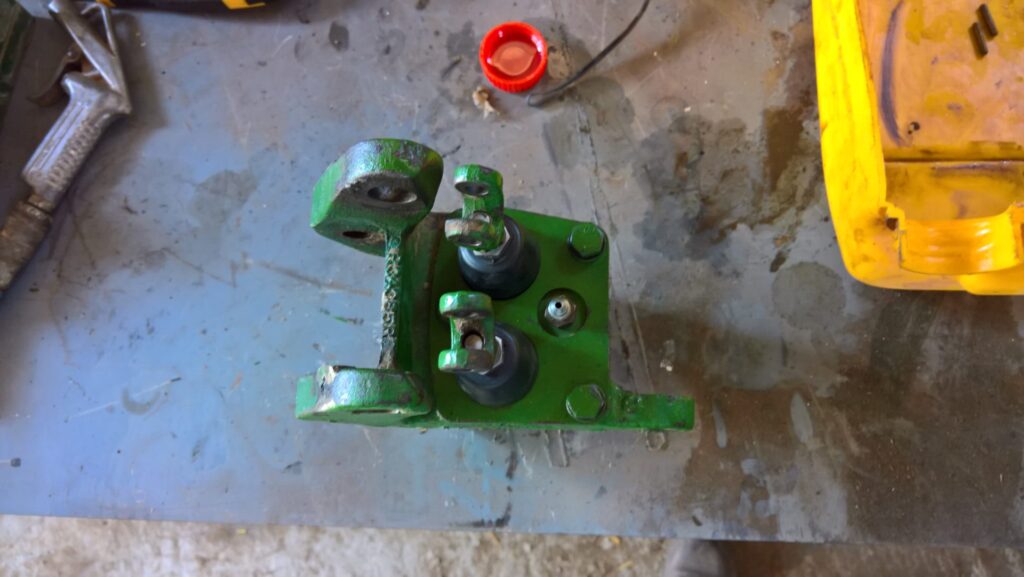
This clever design meant there was little risk of error, allowing him to proceed confidently, knowing that each piece was where it belonged. Finally, with the upper assembly secured, the brake valve was fully restored, and he could rest assured it would function as intended.
Steering valve assembly
During the disassembly, he noticed a subtle issue with the steering valve assembly. It was “sweating” hydraulic oil, indicating a leak, though the exact source was difficult to pinpoint. To address the problem, he decided the entire assembly would need to come out for a thorough inspection and repair.
The first step was to clean it meticulously, using kerosene followed by gasoline to remove every trace of oil residue. This careful cleaning would make it easier to locate the leak and ensure a solid fix, setting the stage for a leak-free steering system.
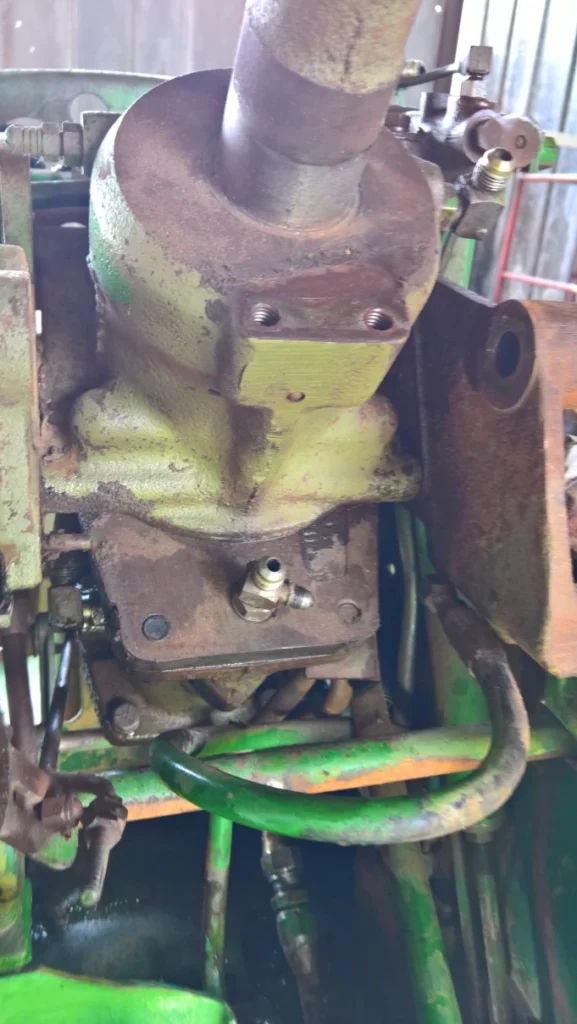
He began by disconnecting all oil lines and the hydraulic selective linkage, which were blocking access to the steering valve assembly. With these out of the way, he could reach the four nuts securing the assembly.
It was a careful process, ensuring each line and connection was properly detached to avoid damage. Now, with clear access to those key nuts, the steering valve assembly was ready to be removed for inspection and repair.
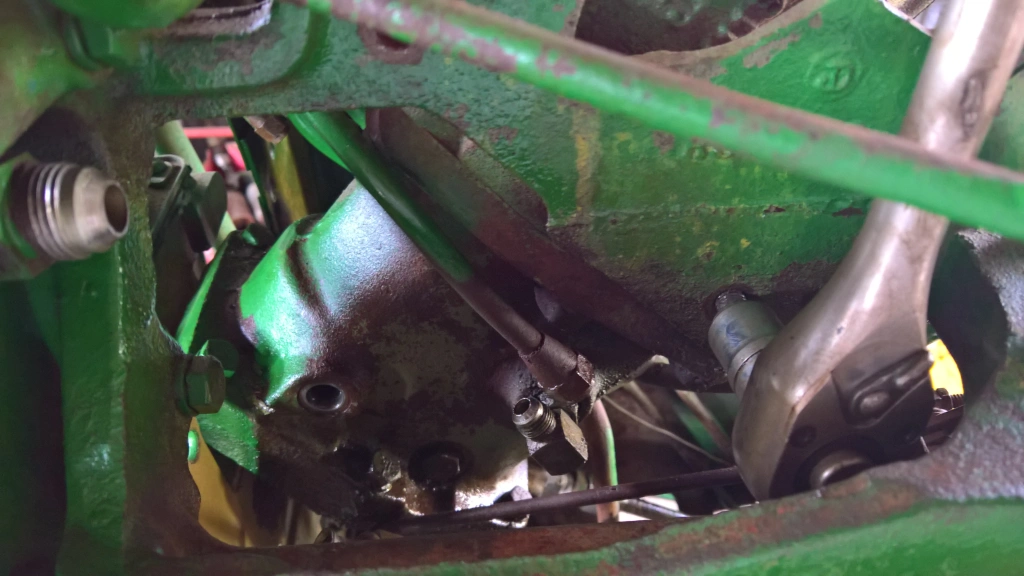
It felt almost as if John Deere had designed the entire tractor around this one assembly. Removing it was no small feat—it required patience and determination. After carefully disconnecting the four nuts, he managed to lift the assembly out, though it proved to be surprisingly heavy.
Once free from the tractor, he brought it straight to the workbench, ready to dive into the repair process and finally address that elusive hydraulic leak.
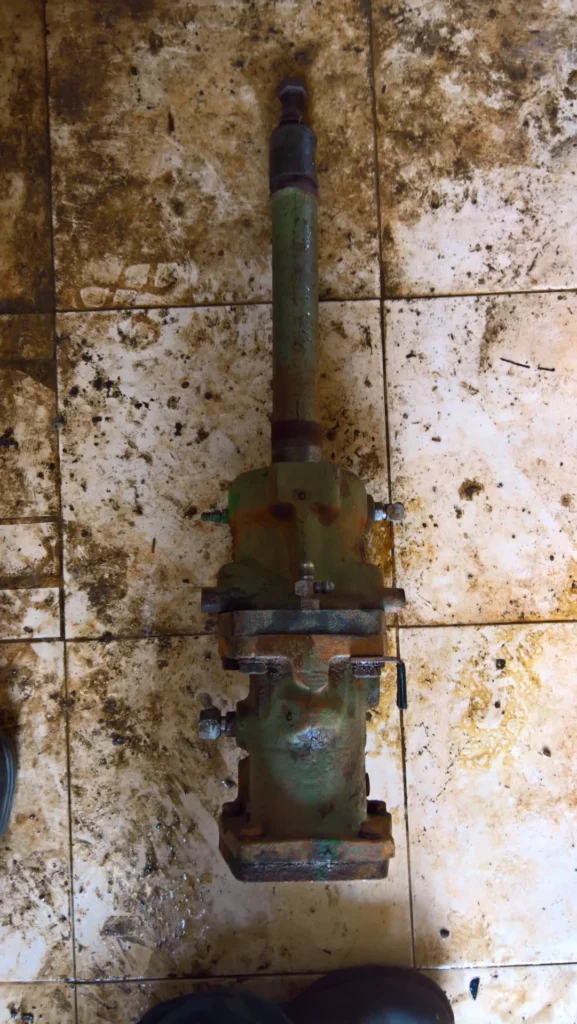
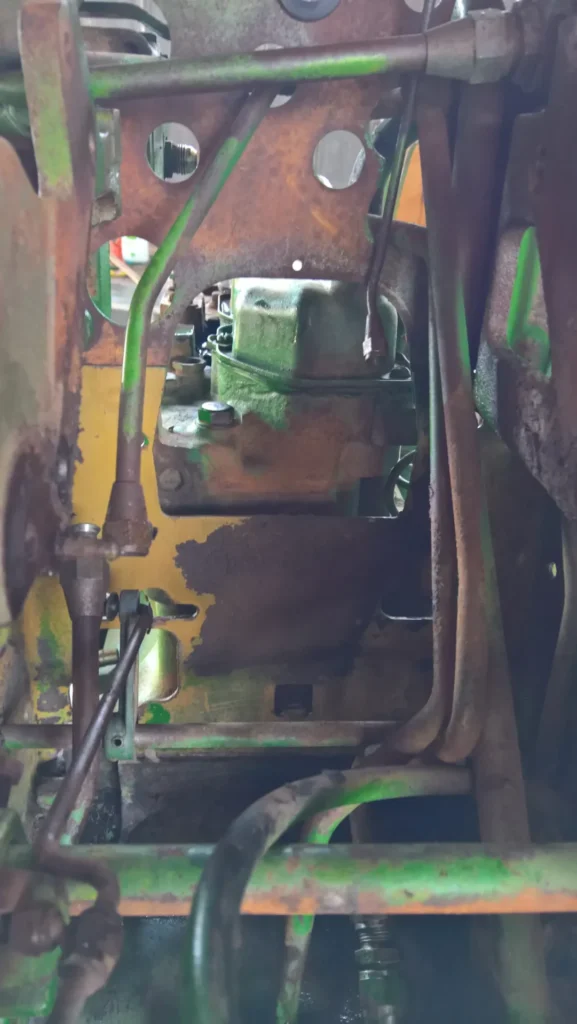
Though the photos of the disassembly and reassembly process didn’t turn out well enough to share, the procedure itself was straightforward. The process required removing twelve nuts—six on each side of the housing—and taking special care not to lose the two bearing balls within the assembly.
Using the AR39585 Steering Overhaul Kit, he replaced all the sealers, O-rings, and washers, ensuring the assembly was fully sealed and leak-proof. However, he chose not to refurbish the internal valves, as adjusting them correctly would require specialized tools.
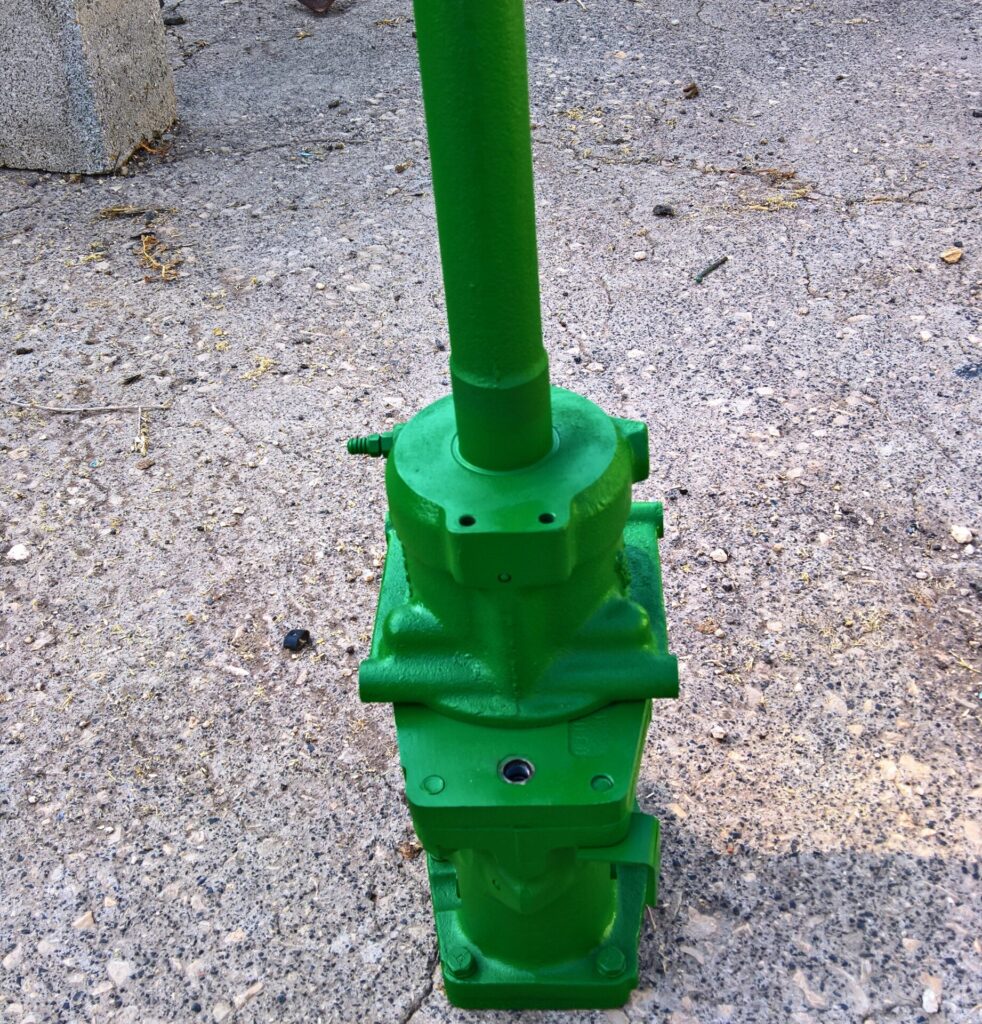
The reassembly was challenging due to the stiffness of the valve seat spring, but he managed it with persistence. Once fully reassembled, he closed the housing, cleaned everything meticulously, and gave the unit a fresh coat of paint, restoring it to its original look and functionality.
Painting of parts
With the mechanical refurbishing complete, he faced the final and most daunting step: painting. In the past, every attempt at painting—whether a wall or a chair, with a brush or aerosol—had been frustratingly unsuccessful. But this time, the stakes were higher. A poor paint job would undermine all the hard work invested in restoring the tractor, and that just wasn’t an option.
Determined to get it right, he dove into learning. He watched countless YouTube tutorials, sought advice from friends and professionals, and pored over articles detailing every aspect of a good paint job. Even so, he found himself putting off the task until he finally decided there was no more room for delay. With a set of original John Deere paints in hand, he was ready to tackle the challenge head-on, knowing that this final touch would be the crowning achievement of the restoration.
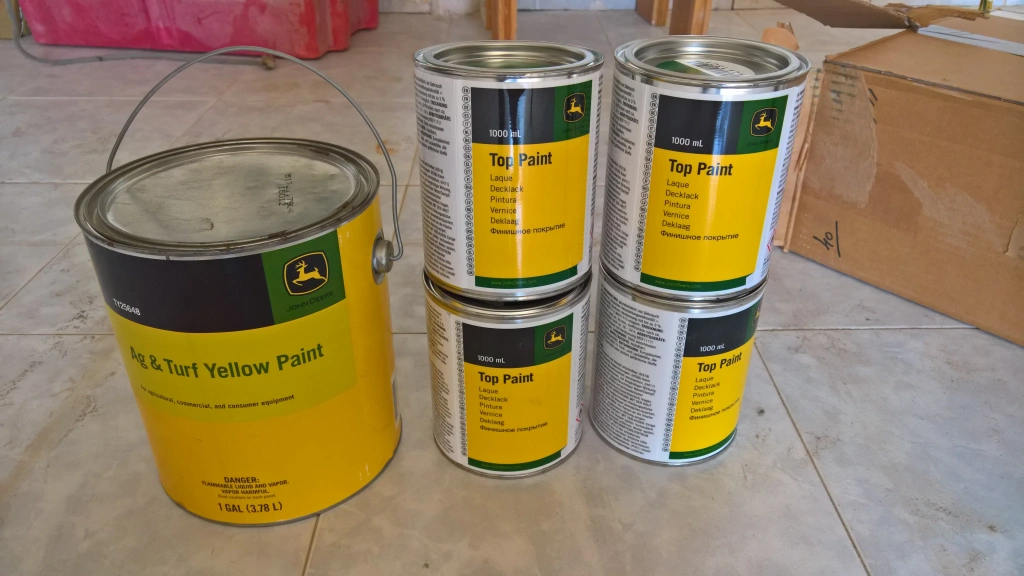
Every component had to be painted individually before reassembling it on the tractor, and the tractor frame itself required painting before reattaching all those parts. To prepare, he carefully sanded and polished each piece, ensuring a smooth surface, then meticulously cleaned away dust and oil using thinner (Mark-32). This step was essential to help the paint adhere evenly and smoothly to the metal.
For internal and heavy-duty parts, he began with a coat of anti-rust paint to provide an added layer of protection. This preparation laid the groundwork for a finish that would not only look great but also stand up to wear over time, preserving the tractor’s new look for years to come.
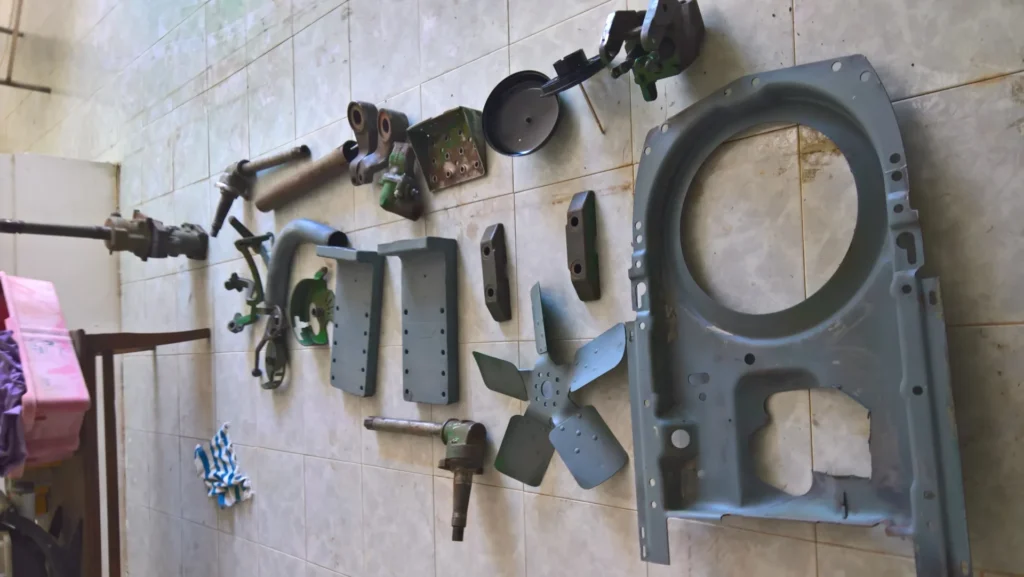
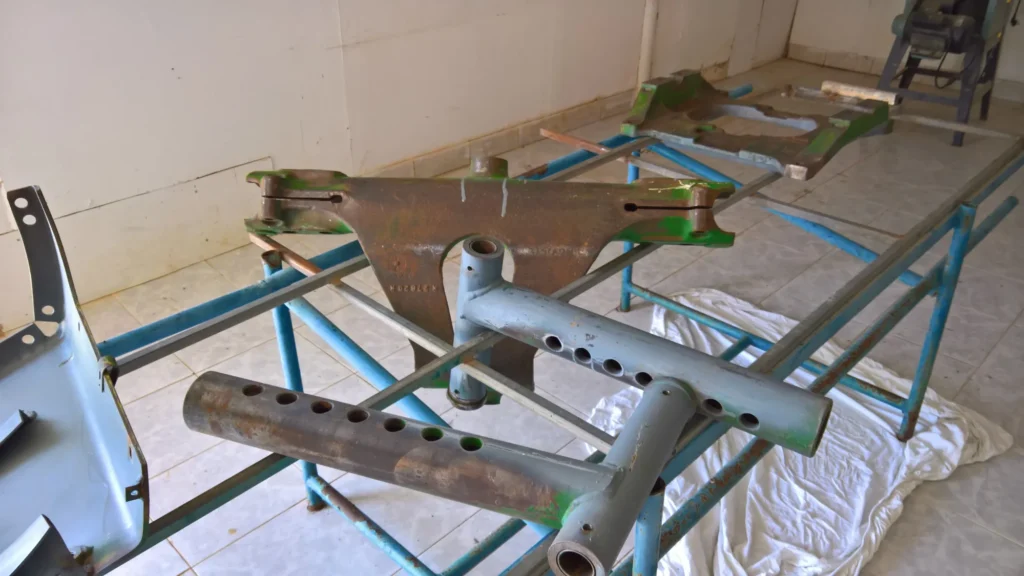
After the anti-rust coat, he wiped each part once more with thinner (Mark-32) to ensure a spotless surface before applying the final paint. Using a medium-high air volume and low paint volume setting, he carefully applied three coats to each part. This technique allowed for even, controlled coverage, bringing out a smooth, professional finish.
By the second coat, the results were already impressive, and his confidence grew as the vibrant green color began to shine through. Finally, with each part drying after the second painting phase, he could see the restoration coming together beautifully—every piece now looked as fresh as the day it left the factory.
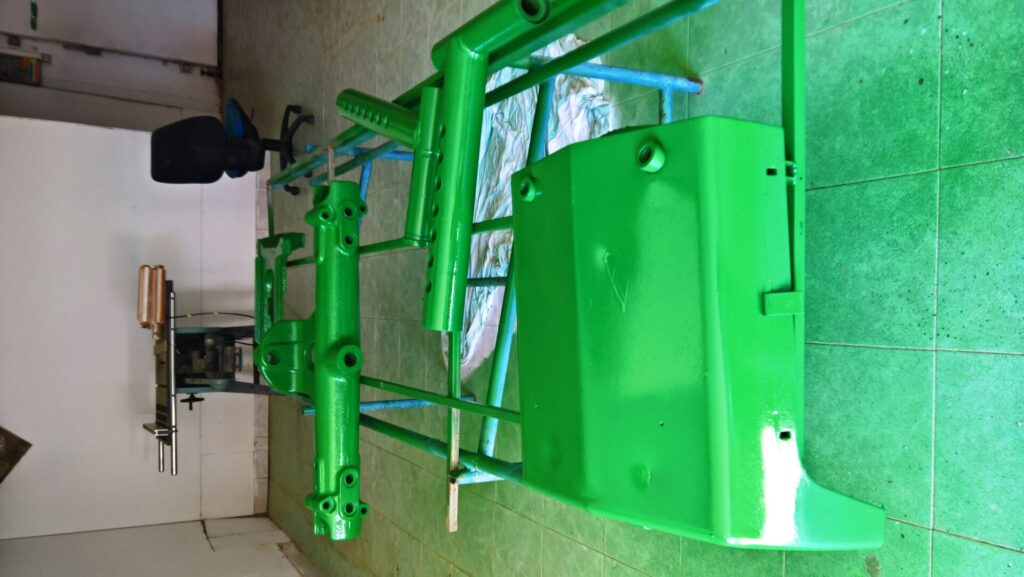
Any paint drips or uneven spots were carefully sanded and polished between coats to maintain a flawless surface. This extra attention to detail ensured that each layer of paint would be smooth and consistent, free from imperfections.
With the surface prepped to perfection, he applied the final coat, knowing this meticulous approach would give the tractor a professional, polished look worthy of all the hard work invested.
The starter
The original starter proved to be in excellent condition and worked flawlessly, a reassuring discovery amidst the restoration process. However, he noticed an odd issue with the fuel filters: they were mounted in the wrong place. For some unknown reason, someone had improvised their position, attaching them to the right side of the tractor’s frame instead of their correct location on the left side of the engine block.
This misplacement was puzzling, but he knew restoring them to their original position was essential. Returning the filters to their intended spot would honor the original design and ensure the tractor operated as it was meant to.
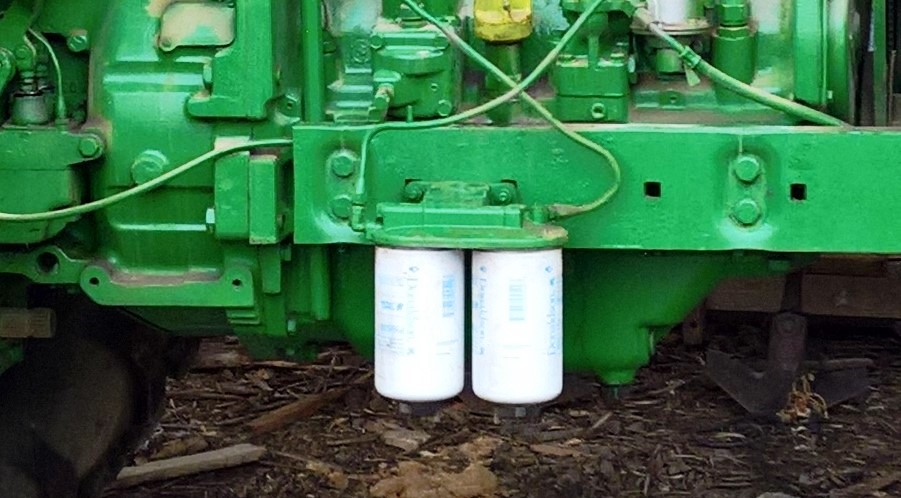
With the fuel filter housing finally connected in its rightful place on the engine block, a new issue became apparent. There simply wasn’t enough space to fit both the filters and the large Delco starter. One of them had to go, and after some consideration, he made the decision to remove the old starter.
While it was tough to let go of a perfectly functional original part, this choice allowed the fuel system to be restored as designed. The Delco starter’s removal cleared the way for the filters to sit snugly in their intended position, bringing him one step closer to a fully authentic restoration.
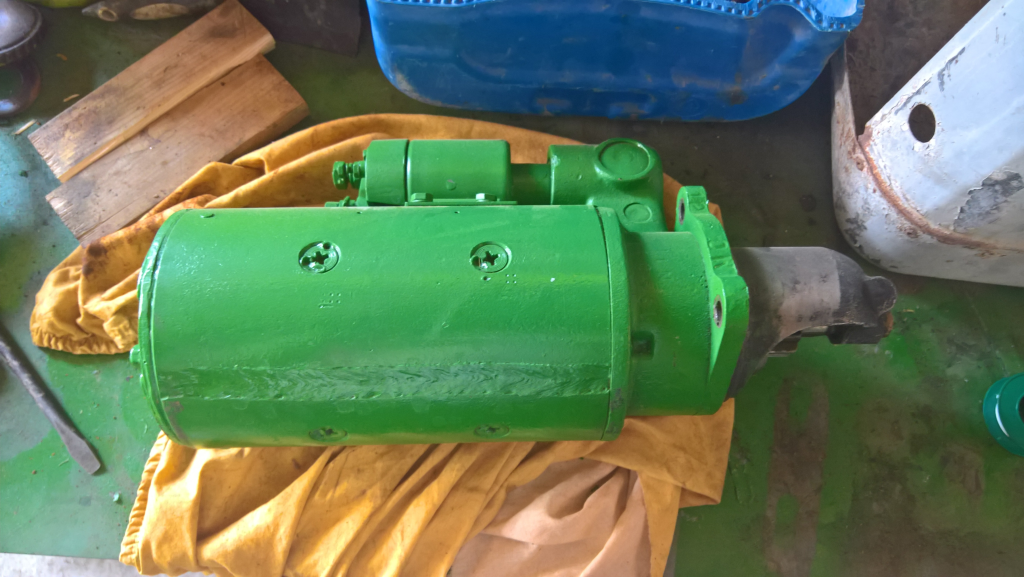
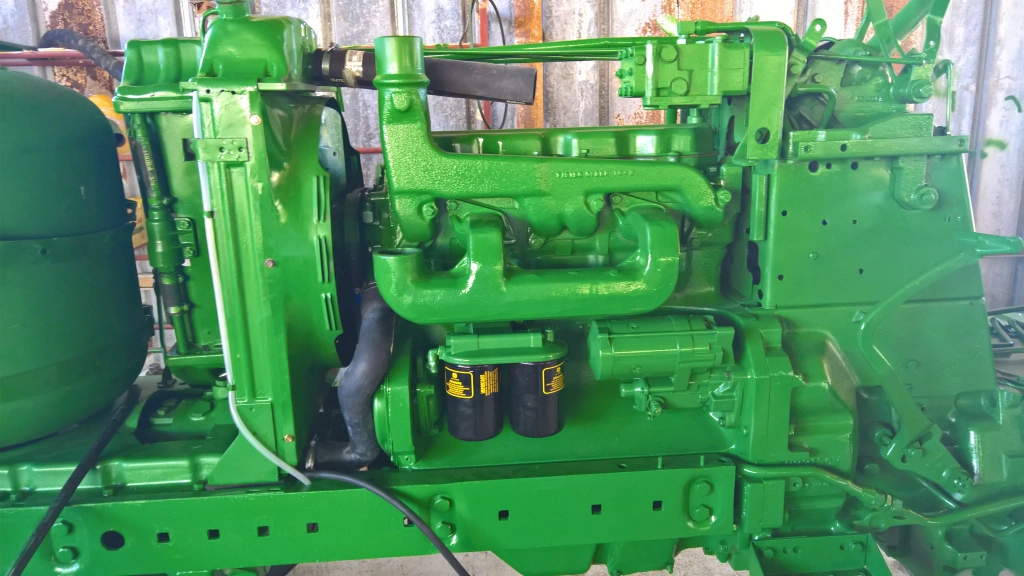
To solve the space issue, he purchased a new compact, high-powered starter that would fit neatly alongside the fuel filters. Staying true to the tractor’s look, he painted the new starter in John Deere green and carefully installed it. With the starter and filter housing now in place, everything fit perfectly, just as it was originally designed.
The sight was satisfying—the engine compartment looked exactly how it should, with each part in its rightful place, blending functionality with the tractor’s authentic vintage aesthetic.
Wheels Restoration
Disassembling the rear wheels seemed like a straightforward task. The process started with releasing the nuts on the wheel sleeves—three in the front and three in the back on each sleeve. This step relieved the pressure on the shaft, allowing the sleeves to loosen.
Next, he turned the screw to push the sleeves out, and finally, rotated the pinion to slide the wheel smoothly off the shaft. Following these steps precisely made it manageable, ensuring each component was safely removed without putting undue strain on any part of the wheel assembly.
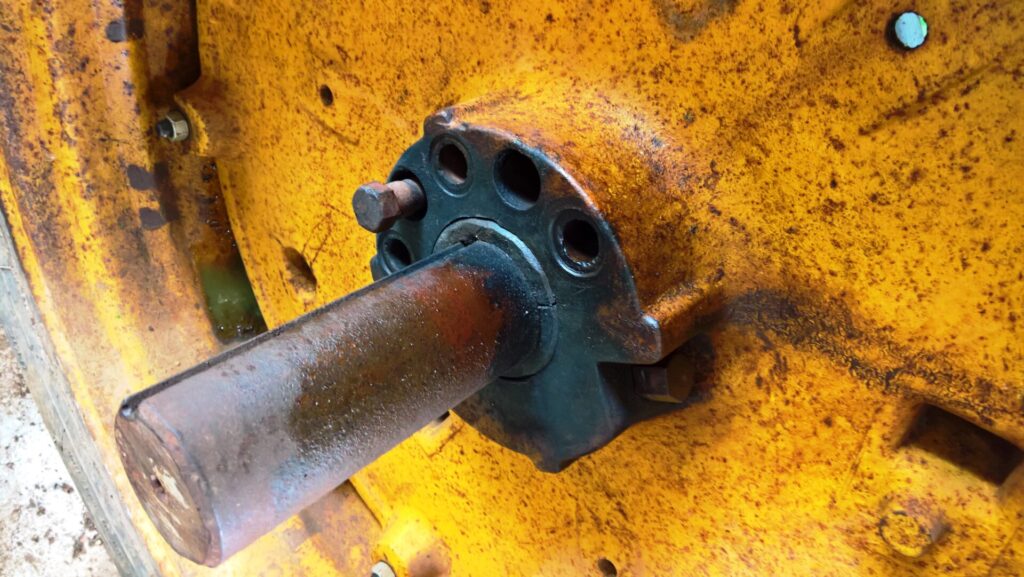
The left rear wheel slid off without any issues, but the right one was a different story—it was completely stuck, as if it had been “born in hell.” To break it free, he had to use a torch, heating and cooling the wheel repeatedly to loosen its grip on the shaft.
Even then, it took a long rod for leverage to finally budge the stubborn pinion. After much persistence and careful maneuvering, the right wheel finally surrendered and slid off the shaft. It was a tough battle, but one more step was complete in the restoration process.
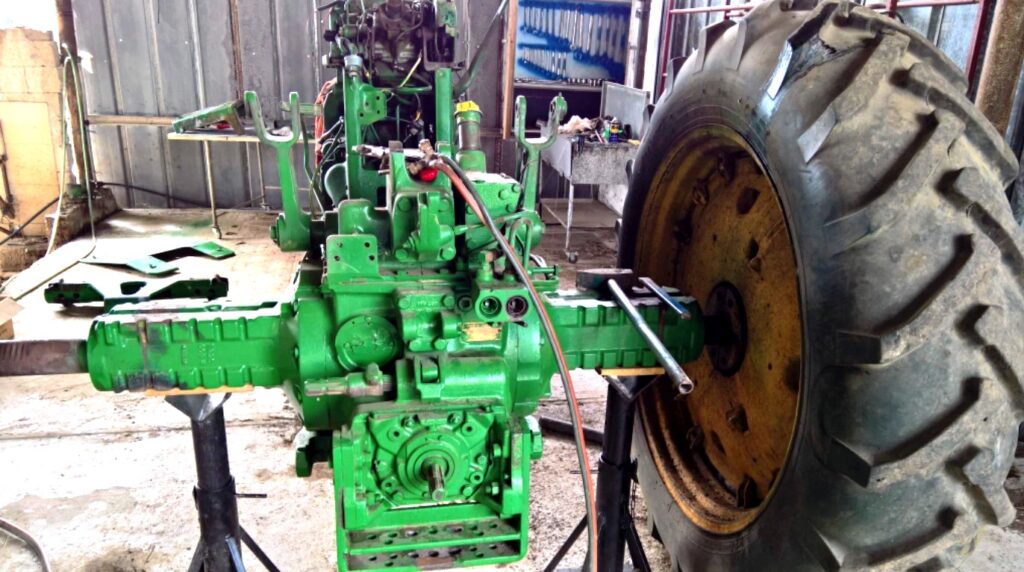
With the rear wheels finally off, he removed the old tires and replaced all the nuts and bolts connecting the rim to the wheel, ensuring a secure fit for the new setup. Removing the front wheels was a breeze compared to the rear, coming off easily without any fuss. However, a closer inspection of the hubs revealed yet another task—they were worn and would need to be replaced as well.
It was another unexpected step, but each upgrade brought the tractor closer to its original, reliable form.
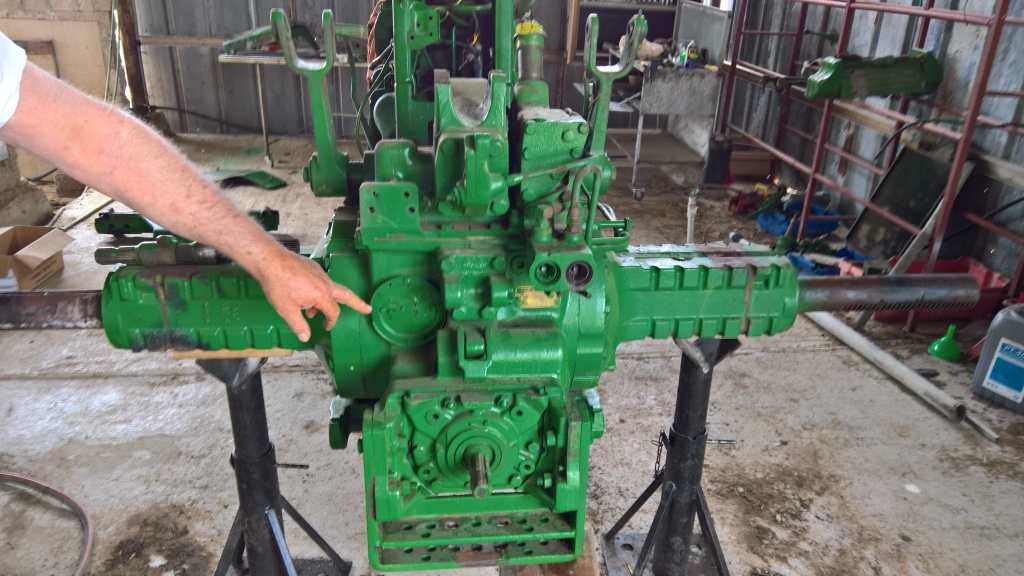

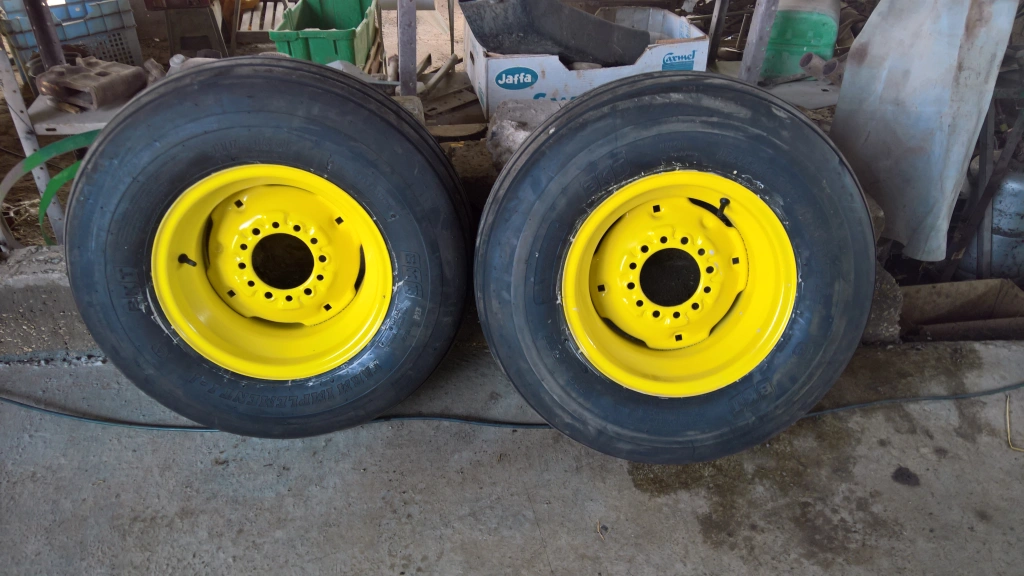
The front wheels, though original John Deere, were mismatched in size—the left was 16-9, and the right was 15-7.5. To keep the restoration true to form, he decided to replace them with genuine 15-10 wheels.
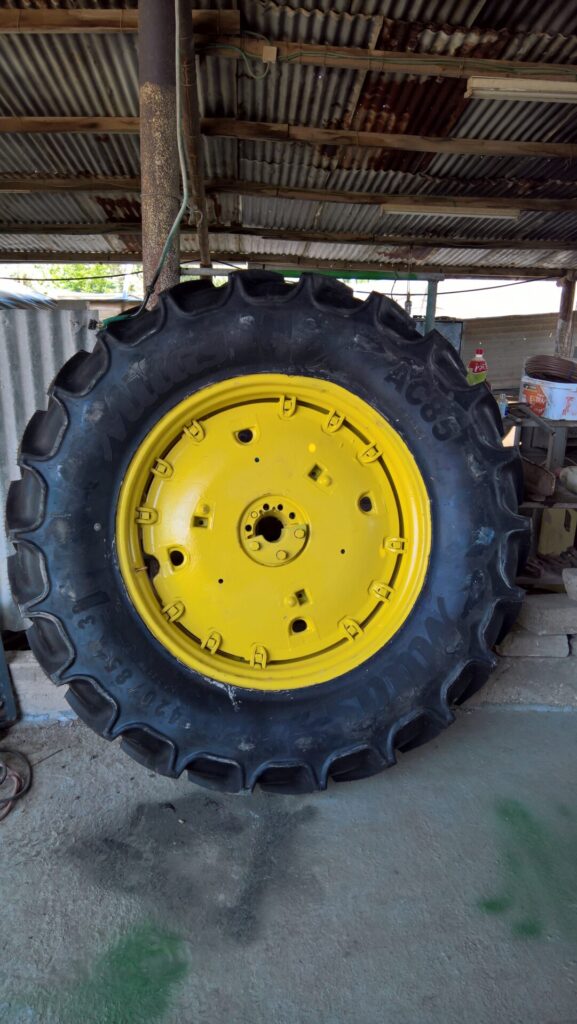
He took all the wheels, sleeves, nuts, and bolts for sandblasting to clean away years of grime and corrosion. With everything prepped and smooth, he applied three coats of John Deere yellow, bringing back the vibrant, factory-fresh look. Now, the wheels were not only the correct size but looked as if they had just rolled off the assembly line.
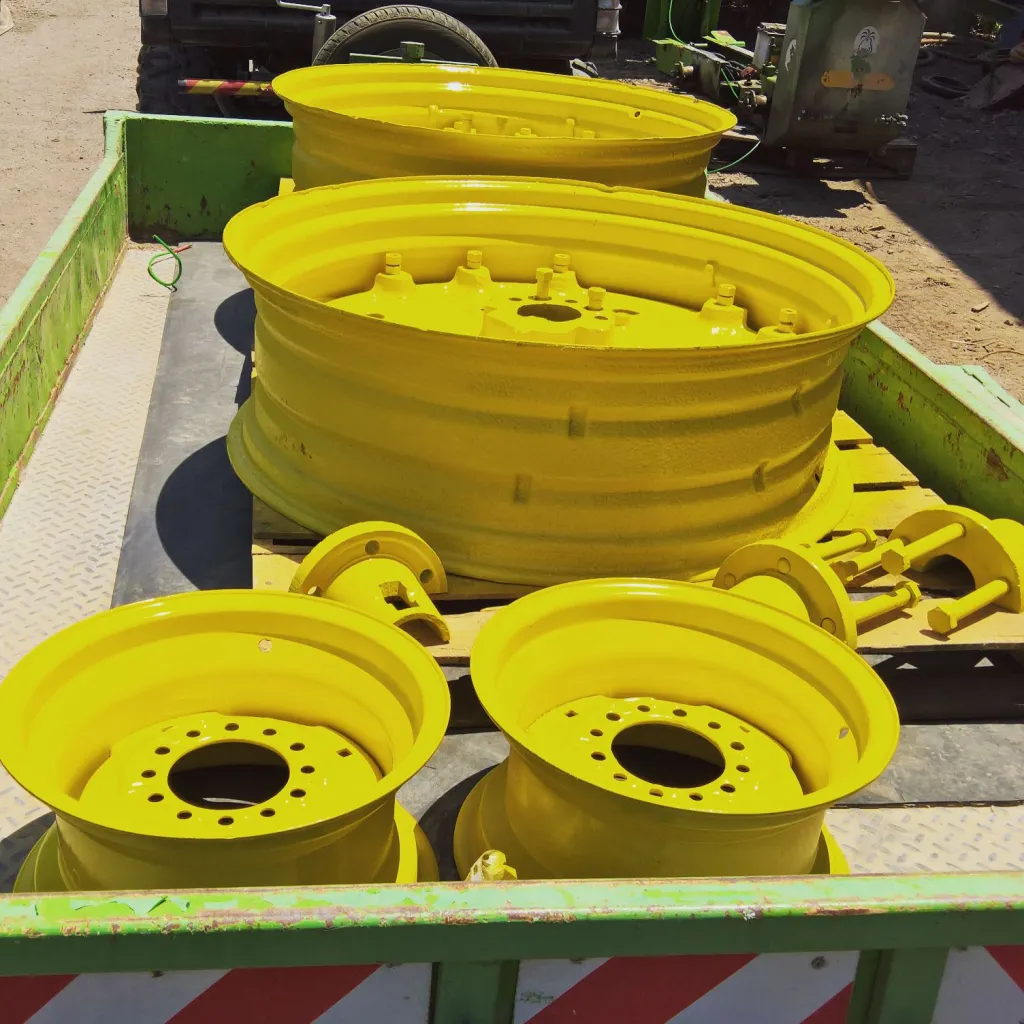
The front wheels, freshly painted and fitted with new 15-11L tires, were now ready for installation. With the correct size and that unmistakable John Deere yellow finish, they looked pristine and matched perfectly, adding the final touch to the tractor’s front end.
It was a satisfying moment, knowing the wheels were now both authentic and ready for the road ahead.
The rear wheels, now outfitted with new 28-16.9 tires, were also ready for installation. Freshly painted and perfectly sized, they completed the tractor’s stance, restoring its robust and balanced look.
With both the front and rear wheels prepped and ready, the tractor was one step closer to being fully reassembled and ready for action.
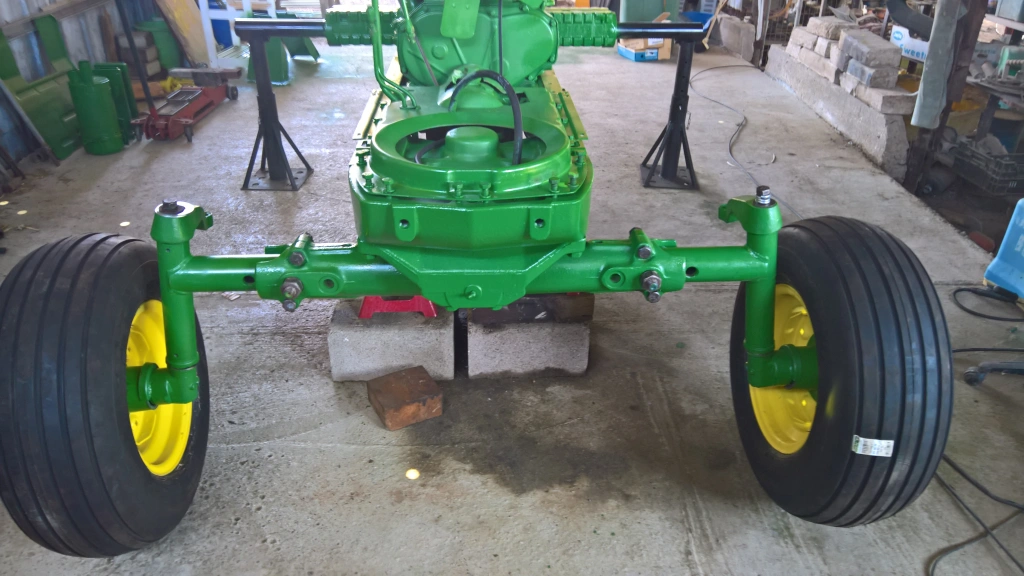
With the old hubs swapped out for new ones, complete with a fresh bearing kit and new rods, everything fell into place smoothly. The hard part was behind them, and now it was time for the finishing touches on the front end.
The front wheels went on without a hitch, each component fitting precisely as it should. With sturdy new hubs and freshly installed wheels, the tractor was beginning to look and feel like new, standing solid and ready for the next steps in the restoration.
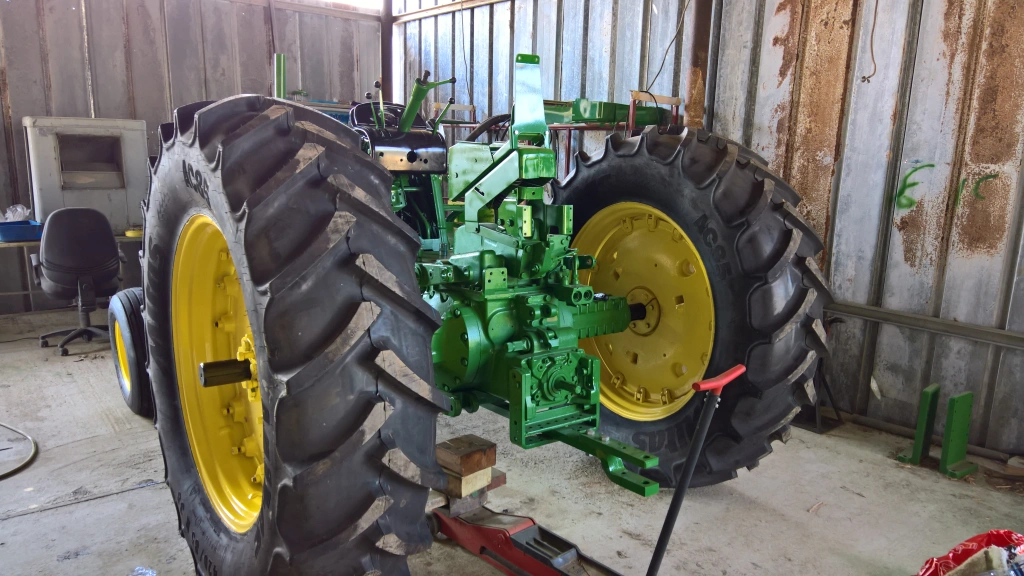
With the front wheels securely in place, it was time to tackle the rear wheels. Following the reverse of the disassembly process, he carefully slid each rear wheel onto the shaft, aligning everything precisely. The sleeves were tightened down, and each nut was secured, ensuring a stable fit.
Once the final adjustments were made, the rear wheels were locked in, completing the tractor’s foundation. Now standing on its own freshly restored wheels, the John Deere was beginning to look like its old self again, solid and ready to roll.
Steering motor
While inspecting the tractor, they noticed that the hydraulic oil pump was leaking from the pivot sealer. Fixing it meant removing the pump entirely, and since they were going to that extent, they decided to go a step further and rebuild the steering motor as well.
This task required a significant amount of disassembly, including:
- Removing the hood and sheet metal panels.
- Taking out the fuel tank, air filter, oil cooler, and radiator.
- Removing the housing plate.
- Detaching the front hood mask.
- Taking off the left frame bar.
- Finally, removing the steering motor itself.
It was a complex process, involving careful work to get each piece removed without damaging anything. But with everything now exposed and accessible, they were set to overhaul both the hydraulic pump and steering motor, ensuring both components would operate flawlessly.
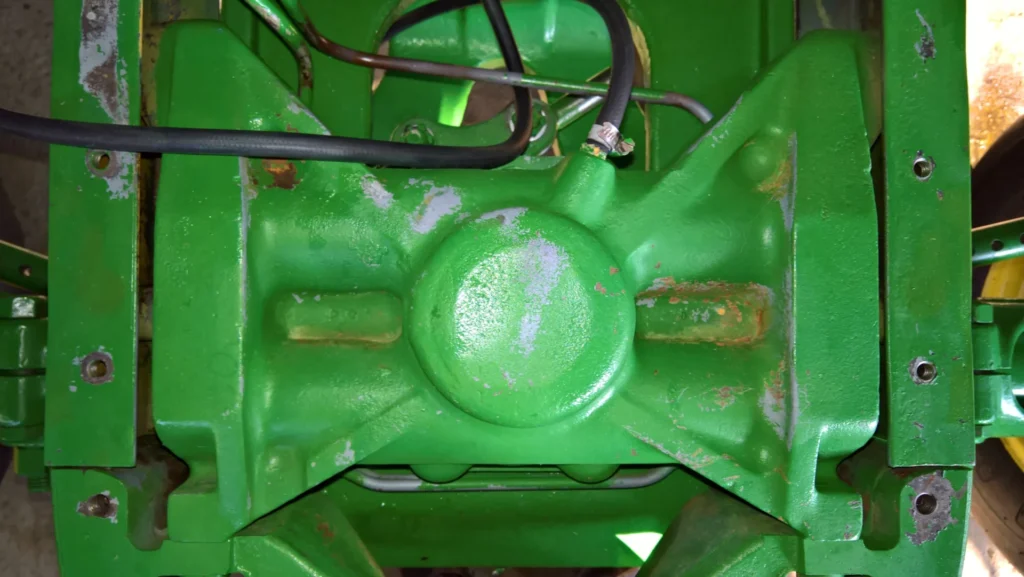
The steering motor rebuild turned out to be relatively straightforward. Using the OH kit (AR52016), they carefully replaced all the O-rings and back-spacers, ensuring each seal was fresh and secure.
This simple but essential step meant the steering motor would be leak-free and ready to perform smoothly, contributing to the overall reliability of the tractor once reassembled.
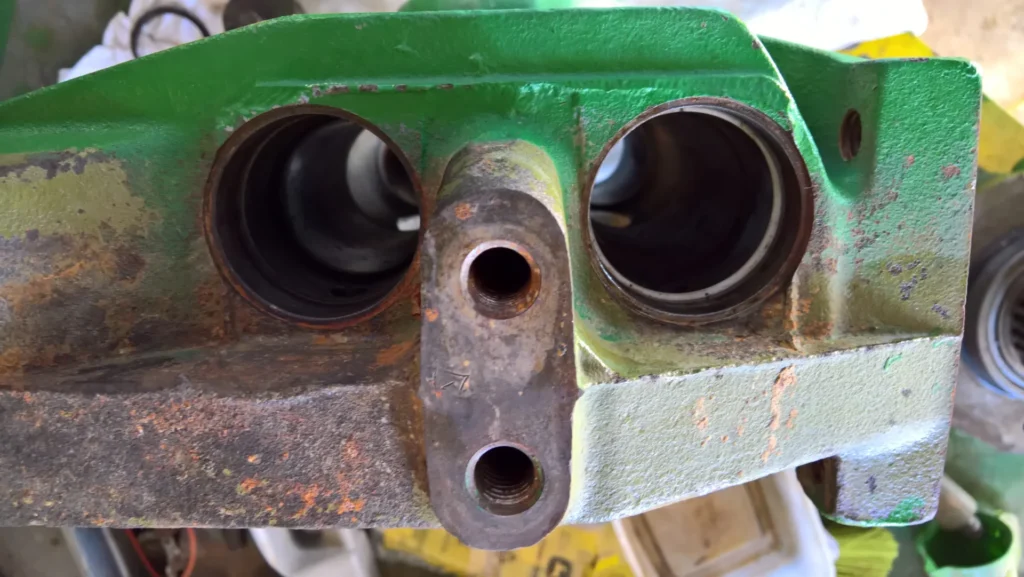
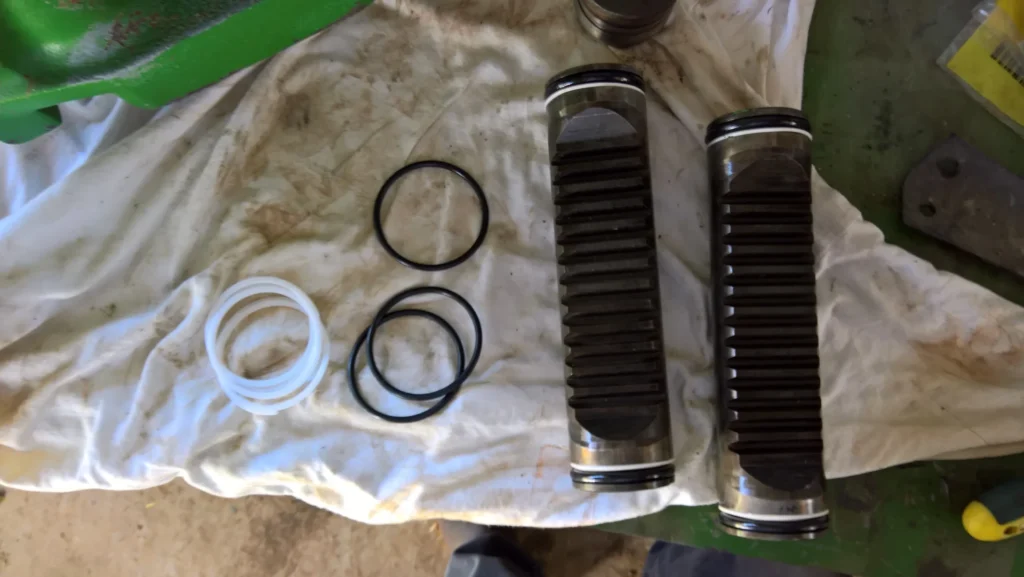
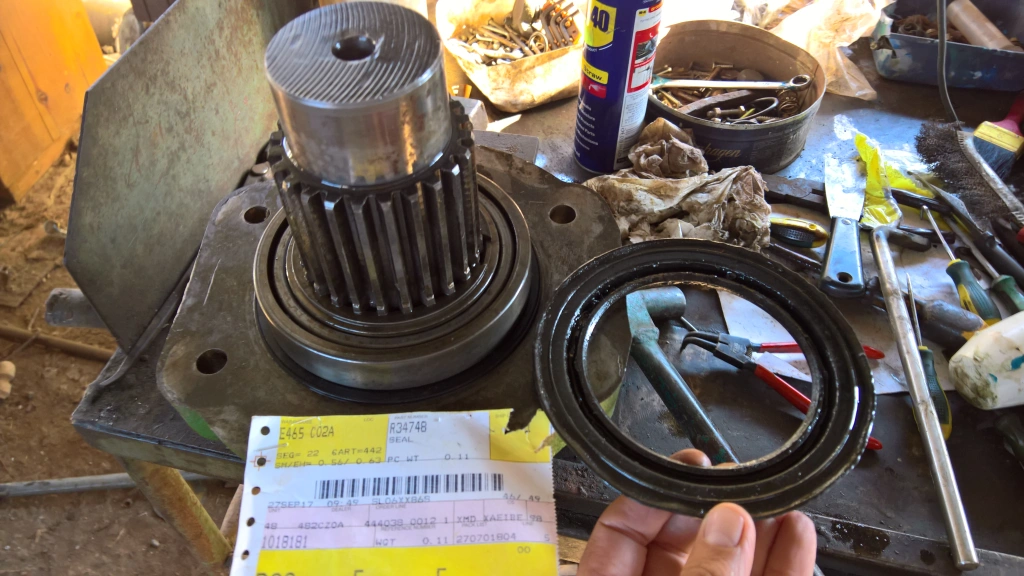
In addition to the O-rings and back-spacers, they replaced the sealer on the pinion (R34748) to ensure a complete and thorough rebuild. This small but crucial part would help prevent any potential leaks from the pinion area, further enhancing the steering motor’s performance and durability.
With all seals renewed, the steering system was now primed for smooth and reliable operation.
Reassembling the steering motor was straightforward, but it required careful attention to detail. First, the rear piston needed to be pushed fully to the left, while the upper piston had to be moved completely to the right. The pivot was then aligned carefully, ensuring that the markings on the pivot and the motor body lined up precisely.
This alignment step was essential to ensure proper function once reinstalled, setting up the steering motor for accurate and smooth operation when the tractor was back in action.
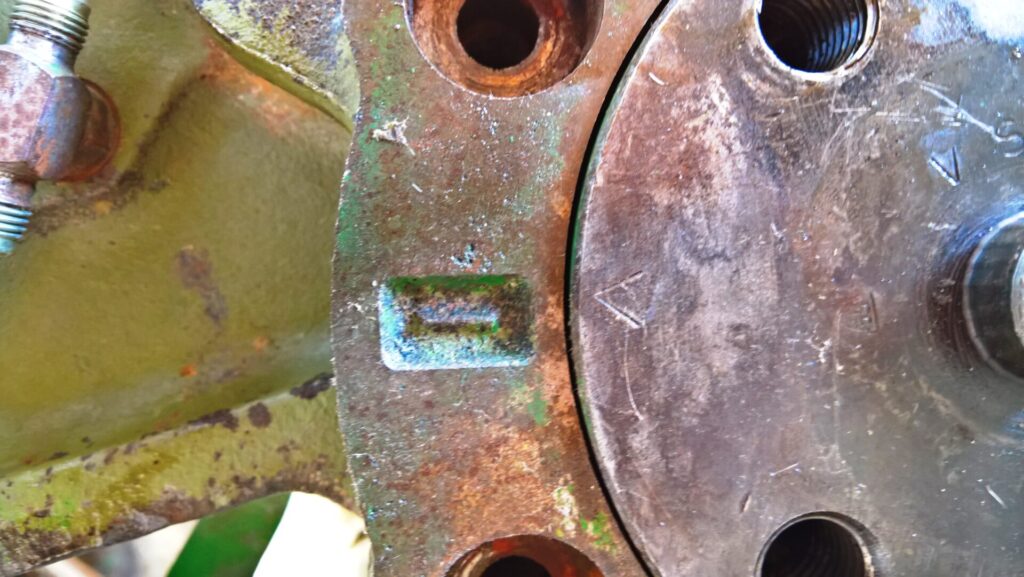
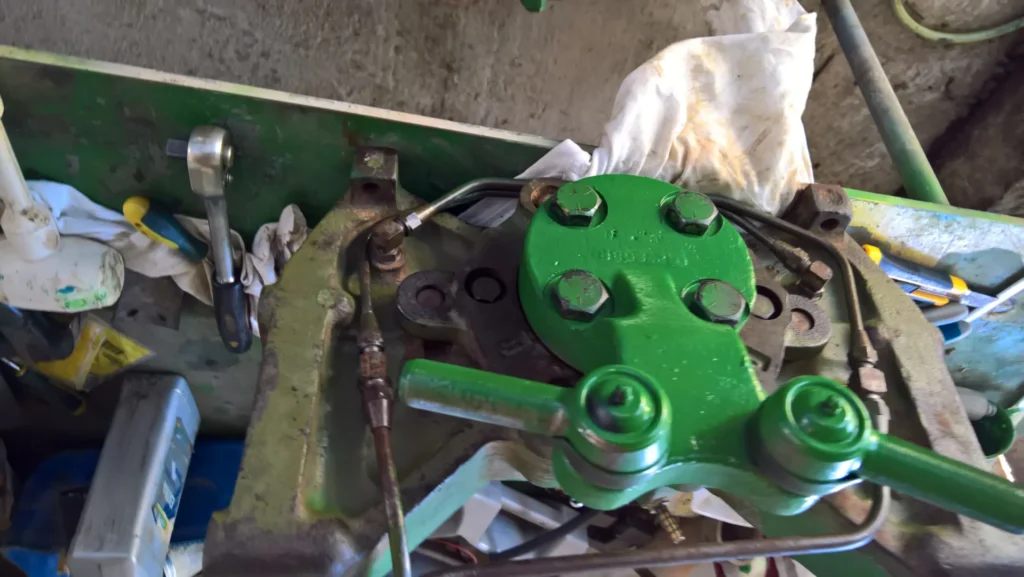
With the steering motor fully rebuilt, it was time to reinstall it, following the reverse order of the disassembly process:
- Start by positioning the steering motor and securing it in place.
- Reattach the left frame bar.
- Install the front hood mask.
- Refit the housing plate.
- Reinstall the radiator, oil cooler, air filter, and fuel tank.
- Replace the sheet metal and hood.
Piece by piece, everything went back on smoothly, restoring the tractor’s front assembly. Now with the steering motor and hydraulic pump securely back in place, the tractor was one significant step closer to full restoration.
Battery box and braking light
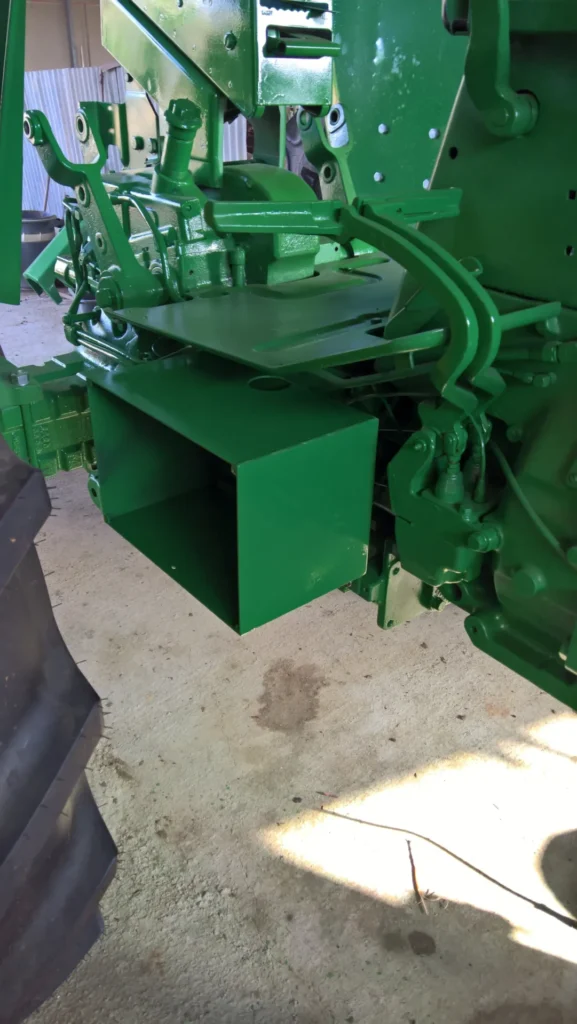
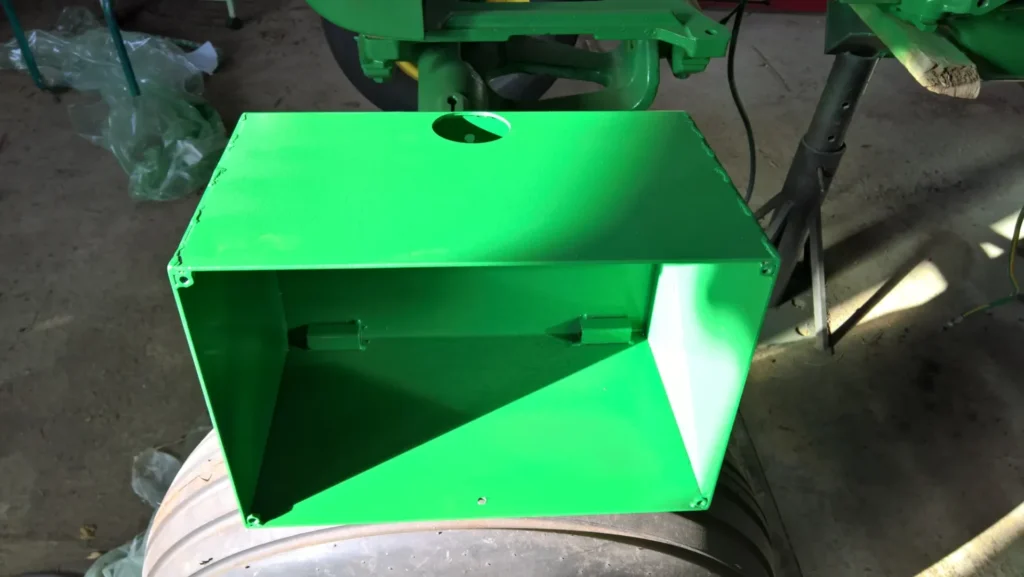
Originally, the tractor was equipped with two 6V narrow batteries, one on each side. However, at some point, it had been converted to a single battery, mounted on an improvised and rather unattractive stand on the left side. To restore the tractor’s clean, classic look, he designed and built a new battery box tailored to fit a single battery, now positioned on the right side.
This new box, complete with a cover, preserved the streamlined appearance while providing a secure and functional setup for the updated battery arrangement. It was a small but impactful change, bringing the tractor closer to its authentic design.
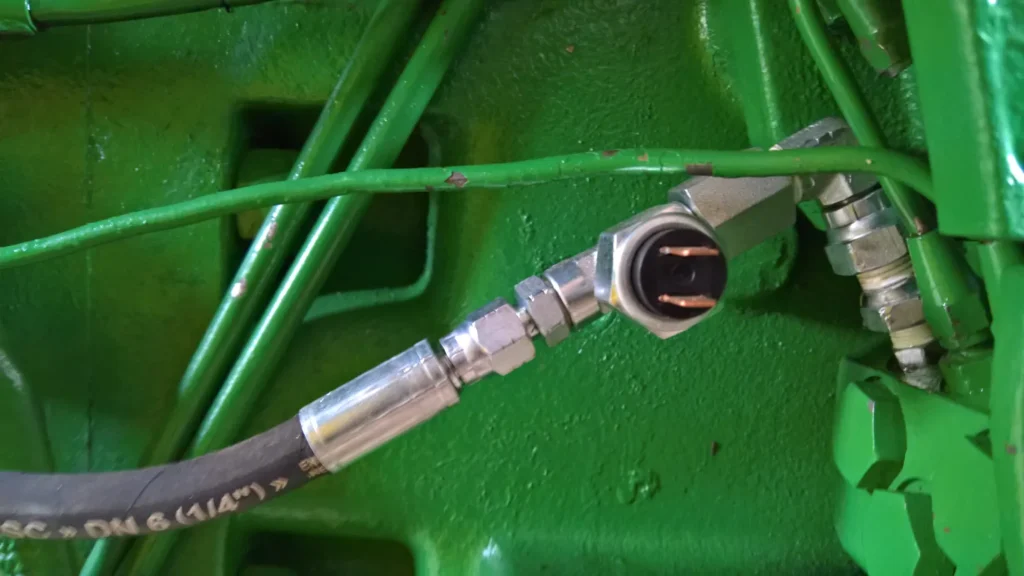
In its original design, the tractor hadn’t been equipped with brake lights—a standard omission back in the day. However, to ensure safety on modern roads, he installed a pressure unit connected to the right brake pedal. This addition enabled brake lights, providing crucial visibility to other drivers when the tractor was out on the road.
This thoughtful upgrade preserved the tractor’s classic look while adding a practical feature, blending vintage authenticity with essential modern safety.
The End
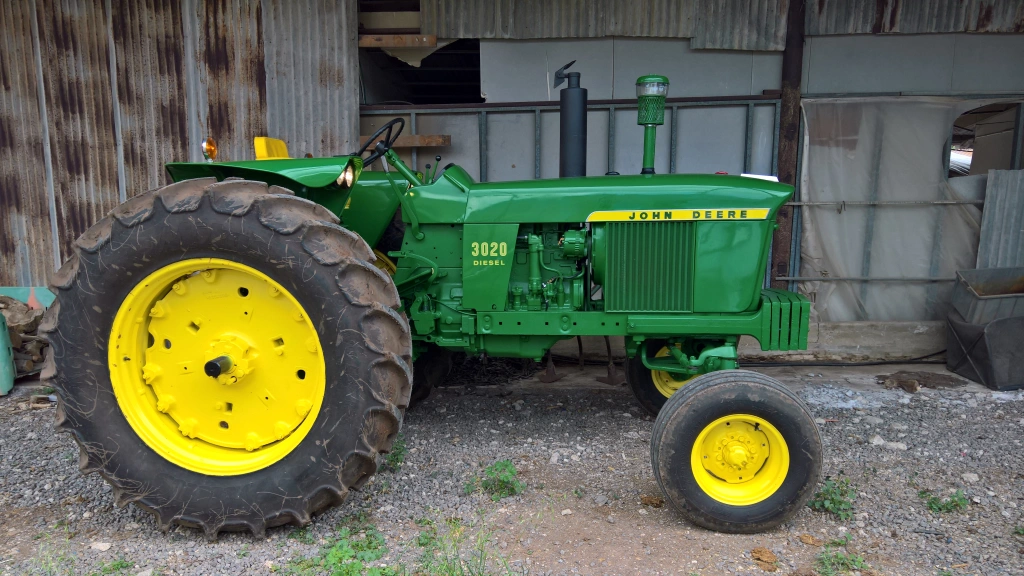
At last, the project was complete! Every detail, from the freshly painted frame to the precision-aligned components, reflected the time, patience, and effort invested. It had been an incredible journey—one filled with learning and a newfound appreciation for the craftsmanship and engineering of John Deere’s early designs.
Standing back to admire the final result, he couldn’t help but feel immense satisfaction seeing the transformation from the worn, weathered machine it once was to the restored beauty it had become. The tractor now embodied both history and hard work, a testament to the timeless quality of a classic John Deere.
Original source: https://re3020.wordpress.com/
